Showing posts with label jelly roll. Show all posts

Saturday, July 1, 2017

Retro Granny

It's so funny to go back and track down when I last picked up any given project. My last post on this quilt was from January 2016 and full of optimism that it would be done very soon. hehehe. It took me until early April 2017 to do so, and it's now July and I'm writing about it.

First off, Kepler would like me to explain to everyone that is is very hard to be a cat in the Schoen household. But he does appreciate all the opportunities to help out with craft projects.
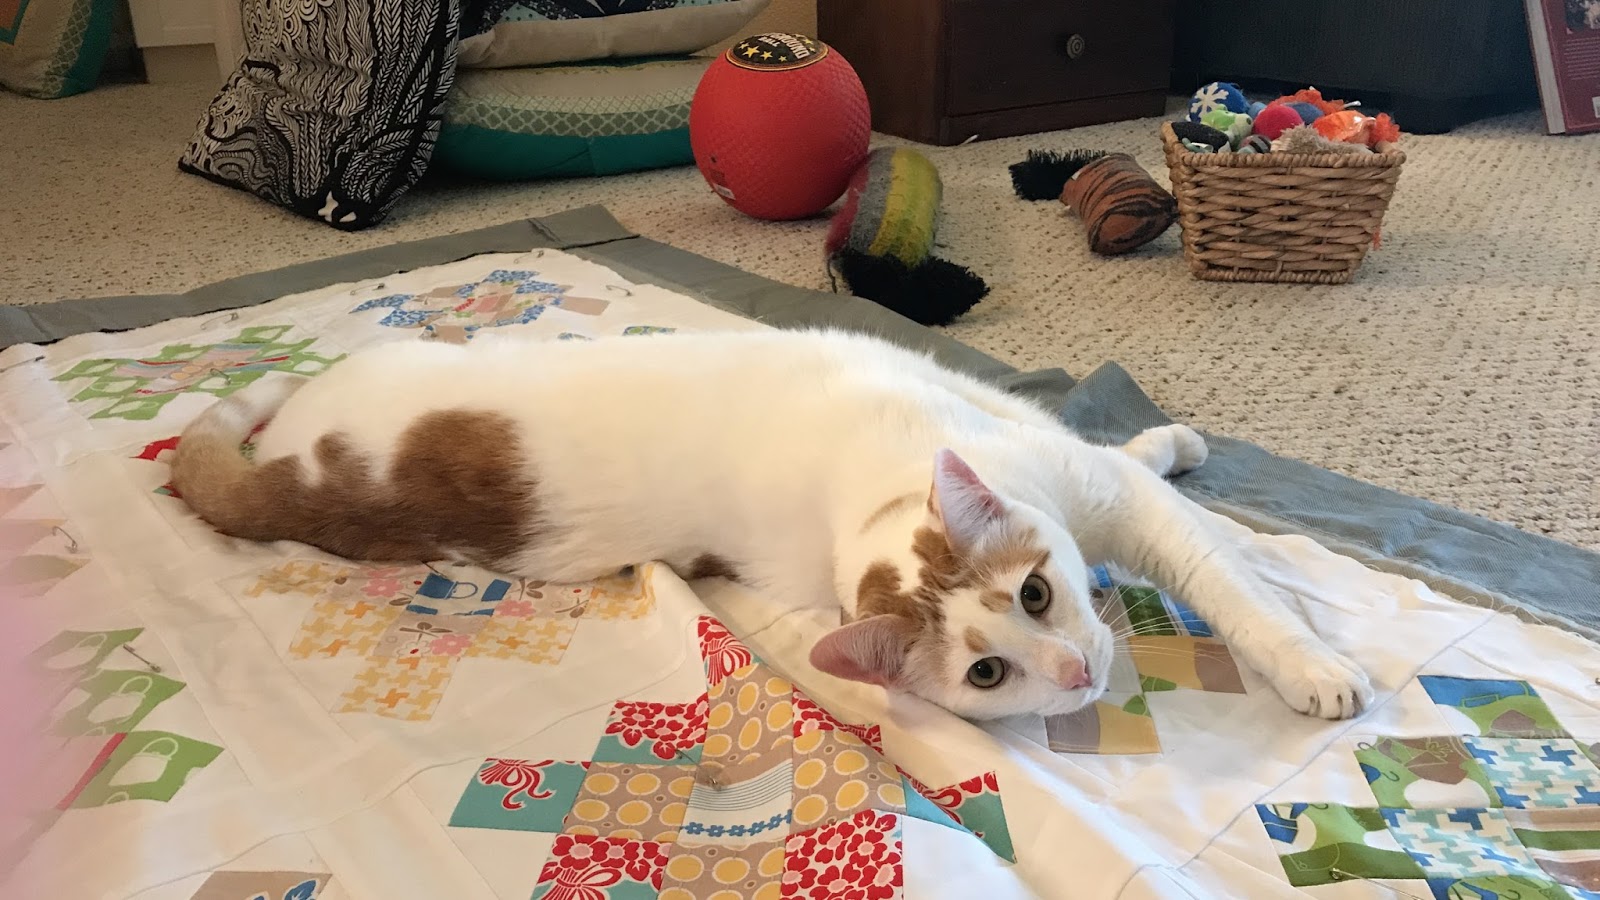

Secondly, I can explain that the long gap was partly due to a new job taking up time, but mostly because I didn't have quilt batting. A normal person's solution to that problem would be to go out and buy some batting the right size for the quilt. My solution? Order a huge roll of batting online. Seriously. I have something like 40 yards of batting on a roll in my closet now. It's a beautiful thing. Of course, it required totally reorganizing the closet to get it to fit in there, but now I have the convenience of cutting off whatever size batting I need for all the quilts I'm going to make. (For like the next 10 years....) 


Back to the quilt at hand, the roll o' batting really did make it very easy. I had a gray flat sheet hanging out with my fabrics that I think works with the 'cool' colors in the Millie's Closet fabrics really well. 


I thought about hand quilting it, but ended up machine quilting using straight stitching along each side of the sashing strips and adding in diagonal lines across each row of blocks. The photo below shows one of the diagonal quilting lines where I chose to stitch three parallel lines. I did this every other diagonal, which made a really neat looking pattern that for some reason makes me think of argyle socks. Maybe it's more of a slant rhyme to plaid, but either way it's cool. White thread makes it just a textural effect rather than additional color. 


I used leftover strips from the Millie's Closet jelly roll to make binding. Jelly rolls make binding oh so easy. The colors progress from pink to yellow to green to blue around the edge of the quilt rather than being assembled randomly. It's probably not noticeable to anyone else, but I'll know it! I stitched the binding on by machine as well, tacking it down with a zigzag stitch in green thread. 


The final quilt is 43" x 54" which is a pretty good size.

Thursday, January 14, 2016

Retro Granny on its way

It's been nice to start the year off with a relatively clean slate. I have just a couple of knitting projects, a few small sewing projects (that have admittedly been hibernating a long time), and this granny square quilt. I've spent the last days brainstorming new things to work on, but I haven't really landed on anything that's truly grabbed me yet. Looking through my notebook of ideas reminded me that I had this (and those other small projects I mentioned) hanging out ready to be finished, so I'll likely spend some time finishing things before embarking on the new and shiny. 


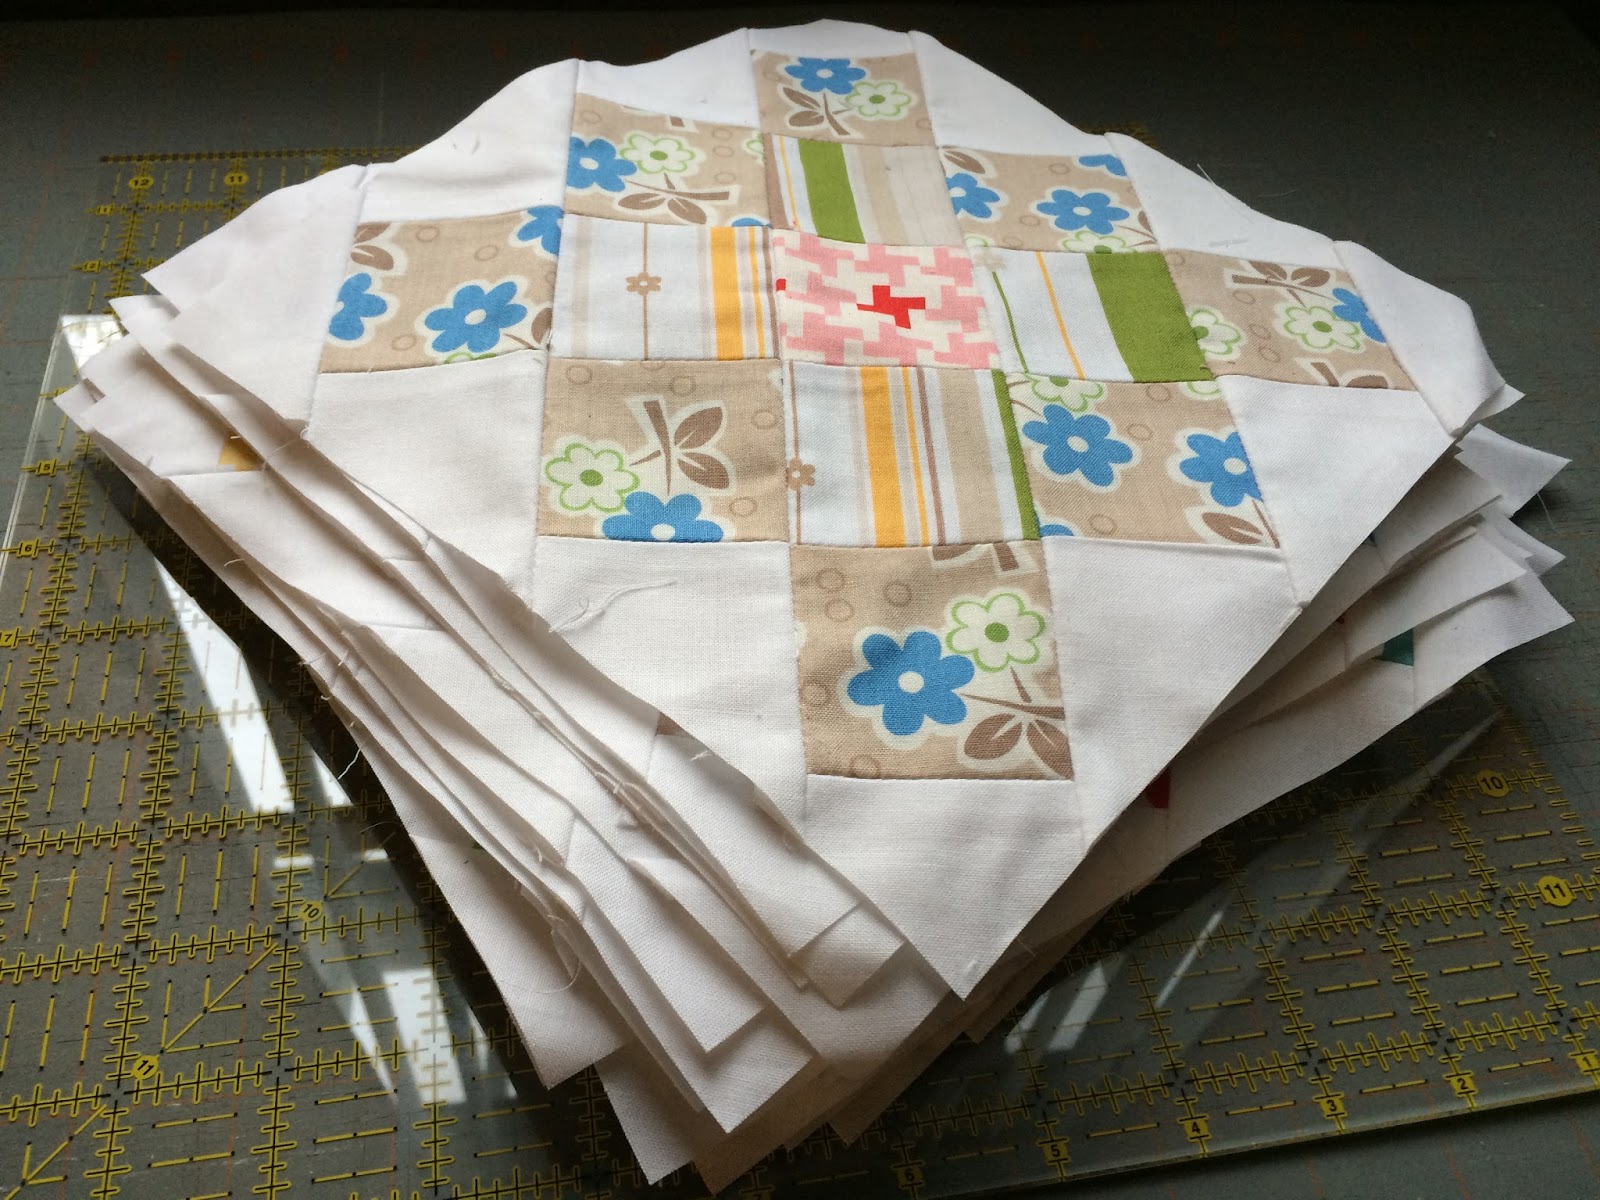
My dear Retro Granny, as I've decided to name her, has been super fun to put together so far. I discovered I was smart and finished all the blocks up before tucking it away. All I had to do to get started again was take out my cutting board and trim squares. Mom bought me a 12.5" square ruler which has made the dreaded task of squaring up blocks SO MUCH EASIER. I've been doing fine without by using my 6 x 24" ruler and some basic geometry, but it's so much faster with this guy. I will never scoff at how expensive quilting tools are ever again. 


See how amazing that square looks? That's right, a perfect nine inches square. Perfect. It didn't take me long before I had the whole stack of 20 blocks all trimmed up and ready for the next step. 


I thought about skipping the sashing and instead sewing these together side by side. I'm 99% sure this is going to be a baby quilt for Dave's supervisor('s baby), but even given that I think it would have turned out smaller than I would have liked. Plus, after perusing Google images I found that I simply liked the versions with the space around the blocks better. So sashing was cut and sewn on, and before I knew it I had myself a finished top!


Right now I'm apparently a pro at finishing up quilts so hopefully basting, quilting, and binding won't be far behind. It's funny, you'd think after all the work I just did over the holidays I'd be ready for a break, but all I wanted to do when we got home was sit down and sew. Well, that and clean the kitchen, but we won't talk about that. 

Wednesday, July 29, 2015

granny squares a-multiplyin'

I put these away for a while in preference for knitting, which is more portable. Hard to take a sewing machine on vacation, it turns out. I also ended up starting and finishing another quilt top with brighter, prettier fabrics that distracted me last week. But last night I had a hankering to keep piecing rather than deal with backing and basting so I found my tote bag full of granny squares-to-be.


I was happy with past self for neatly organizing all of the strip sets into the groups for blocks rather than just shoving them all out of sight. That meant I could easily lay everything out and start stacking pieces for - you guessed it - chain piecing! I had already finished the task of sewing the individual strips together and slicing them crosswise. That's quite a bit of the work, actually, so all I need to do now is match and sew these into the final granny square blocks. Here's one I tested out before the hiatus:


The contrast between rounds isn't as much as I'd like in this one, but I'm confident the others will do nicely. This one will be a quieter block surrounded by its rowdy cousins. As for the rowdy cousins, I got through about half of the blocks with another eight to go.


I really enjoy patterns that take simple shapes and turn them into more complicated blocks in creative ways. These all started out just from long strips of fabric; I didn't have to sew all those little squares together! Sadly, there is no way to shortcut trimming and squaring up blocks. There will be a lot of that to do once I get the rest of these blocks done. 

Friday, June 19, 2015

gettin' my granny on

It was more than a couple years ago when I first saw a scrappy granny square quilt while reading Blue Elephant Stitches. It certainly caught my eye and appealed to something rooted deep inside that loved the bright colors (of course) but very much the more traditional layout and block origin. Being equally drawn to the yarny arts, I have indeed made many a granny square in my time!! It seemed like a special tribute.

I filed it away in memory (aka Pinterest) always intending on figuring out how to make one using a jelly roll. As luck would have it, Jolene kindly read my mind and posted a tutorial on Moda Bake Shop describing exactly that! I had a jelly roll of Millie's Closet hanging around so I mentally lined that fabric up to be my granny square quilt material and promptly put it away for... a while. Of course I did!


Well now I've finally begun my granny square adventure! Aside from the fact that I've got a few quilts that need finishing (understatement), I had a hankering to start something new. Since the not so fun part of cutting most of the width-of-fabric strips was taken care of for me this quilt seemed like a great candidate for a quick fix.

Sure enough, I set to cutting bits and pieces and in a short while had stacks of strips adorning every surface. It took me some time to decide on which ones to match up to make each block, and in the end I really just sort of assigned randomly, but it was satisfying at the end of the day to end up with neat bundles all ready to go. These will make a quilt top, people! So excited. Cutting is my least favorite part.


That was maybe a couple weeks ago and now I've got the first stage of sewing strip sets together finished and most of those trimmed down to be sewn into the final block. I think these prints and colors are going to play really nicely with this pattern. I can't wait to see how it all turns out! I've got friends having littles soon, so this may end up as a special surprise for a mom-to-be when it's finished.

Friday, April 6, 2012

A quilting finish

I'm very excited today because Flora Fence is finished! I finished hand sewing the binding late Wednesday night and had a couple small details to finish up. But now it's done. I started this in late February, and it's taken me just over a month to complete. Not bad for my first "big" quilt!


The scrappy binding used up the rest of the jelly roll and linen scraps I had from cutting the rail fence strips, and turned out pretty nice. I actually very much enjoyed hand sewing it to the back; it took me a few hours over a couple of evenings. I never really understood how it worked until my mom-in-law showed me over Christmas. And even though it involves more finger-pricking, totally worth it because it looks much better than my machine sewn efforts of the past, thanks Mom!


All I have left of that beautiful jelly roll now is four uncut strips to stash away for a scrappy project, and I used pretty much exactly two yards of 54" wide linen. Finished measurements are 52" x 71". I was a little worried how the quilting, which matches up with the front zig zags, would look on the randomly pieced back, but I love it. The staircase pattern works nicely, making this (as Dave says) "two quilts in one".


Our room is ready for Spring!

I'm linking up to my first finish it up Friday :o) 

Sunday, April 1, 2012

Quilting marathon

There are two parts to this post: a lamentation and a celebration. First off, lament. I was excited to try out the 'hand quilting like' stitch setting on my machine to see if I could use it on the Flora Fence quilt. It actually ends up looking kind of nifty on my test run.


Then I turned it over to look at the back.


Bummer! The way this works is that the thread in the bobbin is the color you want and the thread in the needle is "invisible" (in this case, white). Through some sewing machine magic, the bobbin thread is pulled to the top to create the little running stitches, but in the parts between, the needle thread is carried on top and the bobbin thread is carried on the bottom as normal. This of course makes sense when I think about it. I think this will be really fun to use on projects that will have the backs not visible, but obviously this is a no-go for my quilt. Sad. So, regular machine quilting it is. 

Now the celebration. It's quilted! I strong-armed (and shouldered!) my way through my Saturday night and managed to get all of the quilting done in one sitting.


I used four different colors of thread to match whichever color I was quilting next to. I kept it simple and just stitched in the linen zig zags about the width of my walking foot away from the seam (oh how I love the walking foot). 


I used the longest stitch setting on the machine, so at least the intention of a long running stitch is there. What I was most surprised about is how quick and relatively easy this went. I have a regular throat on my machine, so I was a little bit worried about getting a larger sized quilt through especially with so many 90 degree turns along the way. No problem! By rolling the corners in to focus on a single linen stripe and draping most of the quilt over my shoulder (or behind the machine on the trusty card table) I had no problem maneuvering. My shoulder did get tired after a bit due to the weight of the quilt, but thankfully the card table didn't complain one bit. 


All trimmed, folded, and ready for binding! How exciting. 

Thursday, March 22, 2012

Flora Fence

I've been working on a quilt for myself since late February, and I'm happy to say it is coming along swimmingly. I bought a jelly roll of Flora by Lauren & Jessi Jung in December and after much hemming and hawing decided to make a rail fence quilt. Easy cutting, all straight line sewing, adds up to a quick(er) project. I saw this quilt by Red Pepper Quilts, and that clinched it -- simple and fantastic! I've been crushing on linen lately, so I decided to pair a dark linen with the Flora fabrics. I especially like that blue; this will look so nice in our bedroom when it is finished.


To figure out the layout before piecing the blocks together I got out the trusty colored pencils and sketched a few different ideas. Then the blocks got set out on the bed and I fiddled. And fiddled. And fiddled. It took me some time before I was convinced there wasn't too much of any one pattern grouped in one place, stacked them up, and went back to the card table.

I wouldn't say I normally *enjoy* pressing seams, but in this case it was so darn satisfying I kind of wished it wouldn't stop. After 108 blocks though, I was ok with stopping. But look at those seams!


Somehow I had in my head that I'd have enough leftover linen to do the back, but alas I erred. I decided to piece together a quilt back from my stash rather than going out to buy something specific. This was a pretty spectacular process that took place in one evening, like moving in fast forward! I think I ended up liking the back just as much as the front. Almost. As you can see, Jack decided he also needed to offer his opinion. Ordinarily I would have shoo-ed him away from the fabric, but he'll end up sitting on this one when it's done anyway, so why worry.


Here are the finished front and back. Now I need to sandwich it all together and baste. (That word again!) I'm kind of tempted to try spray basting, we'll see. I'm also waiting for a walking foot to arrive for my machine to make the quilting go more smoothly. Maybe I'll have it finished by the end of April!