Saturday, November 30, 2019

anxious for fall

Finally finished! Technically it's still fall ... the season for which this quilt was intended, but we are quickly moving into the holidays so it may have to hibernate until next season. Still, it turned out great as a first quilt in the new craft room and a housewarming gift from me to us. I love fall colors, decorating for fall, brisk fall days, and this seemed like a nice reminder of both that and the fact that we finally found a place to call our own this year. 


The batik I chose (online!) for the back turned out perfectly. Some of the prints and colors on the front were a little out of the box for 'autumn' but the awesome orange backing balances it out nicely and takes the piece firmly into the autumnal look I was hoping for. I'm calling it "Anxious for Fall" because, while moving was exciting and the achievement of a long awaited life goal for us, it was also a very trying and anxious time for me. I can recall working on some of these blocks on a couple of days where I just "couldn't even". It seems funny to commemorate something like that, but if I can laugh at it in retrospect then it doesn't seem so bad. 


I was going to do some hand quilting with pearl cotton, just a couple of lines of rusty orange to make my reference 'x' for the V shaped quilting, but I couldn't find the color at any of my local shops and didn't want to chance picking a color from my computer screen. So instead I did all machine sewing, including the orange 'x'. The color I finally picked for the majority of the quilting is a gray with a greenish undertone. There are so many shades of gray aren't there? Somehow this shade seemed more toned down to me than the bluer or truer grays. It took me an evening to get the quilting done, and wasn't nearly as bad as I thought it was going to be in terms of maneuvering the quilt through my machine.


I made a scrappy-ish binding from two of the Indie prints with more orange in them. Scrappy-ish meaning I used up the first print first than added strips of the second. I'm pretty sure I had just enough to get the binding done, so that's pretty perfect for stash busting purposes. It's about 90" x 60", so a really good size. 


I had intended to do some hand quilting in the tan colored border, but the aforementioned challenge of finding the right color thread makes me think I'll leave it alone. Maybe some day, but it looks really nice just plain too. I really like the way the thin inner border turned out. I normally don't think of putting borders on quilts, mainly in order to keep them looking more modern vs traditional. But in this case even with the borders and traditional churn dash blocks this piece still looks pretty modern to me! I'm very happy with how it turned out and looking forward to getting some good use out of it. 

Tuesday, November 26, 2019

hipster hoopla

Inspired by finishing one hoop, I pulled out the supplies for yet another I've had waiting to be made for a while. I can't recall when I got these cute wooden pieces, probably a couple years ago after the holidays. With them I also had two remnants of flannel plaid. I chose this green one over a more simple red and gray because I liked the extra contrast and smaller patterning better for this. 


This was pretty simple. Originally I had the fabric in the hoop so the squares were just straight across and vertical like a piece of graph paper, but somewhere along the way I decided to rotate it so they were on point. I cut the fabric a couple inches away from the hoop (much more overhang than the flower hoop) and used pearl cotton and a running stitch to cinch it taut. Then all I had to do was hot glue the wooden ornaments to the fabric. I have to say, the hot glue gun smell reminds me so much of being a kid -- that's what you get when you have a really crafty mom!


Instead of leaving the back of this one open, I found myself a piece of felt and used a blanket stitch along the edge to close it up. I used red pearl cotton, which looks quite festive. It's funny it took me so long to get started on this because it didn't take very long at all to finish! Very happy with the result, and I bet Dave has totally forgotten I was going to make this for him, so it will be a nice surprise at Christmas. 

Monday, November 25, 2019

long time coming

As I was cleaning up my craft room today, I found myself moving this from place to place. It's a hoop I started way long ago, like long enough that I don't really remember when. It got stuck in the little ottoman in our living room in a nearly finished state, but apparently forgotten. I wasn't quite sure how to finish it at the time.


I went in the ottoman the other day looking for something else and pulled this out to put in my craft room somewhere in the way so I'd get it done. Turns out, I know myself pretty well. Literally all I needed to do was trim the fabric on the back and pull it tight with a running stitch. Why was that so hard?? Unknown. 


I'm happy it's done now, and am enjoying the fact that this was a long slow make that took several stages. I can remember having the felt flowers on there and leaving it for a while before I went back to add the whimsical embroidery. I think I'll find a nice spot for it in the bedroom. 

Tuesday, November 12, 2019

it's that time again

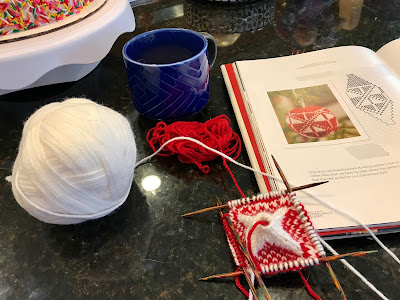
It's heeeeeere! Julekuler knitting season is once again upon us and I'm starting up with gusto. I love knitting up these little guys - instant gratification that can be finished in just a few hours and there are so many different patterns in this book to keep things interesting. 


I've already gotten a few traditional designs knitted up, and I experimented with a three-color puppy paw. If you can find a chart of something online or set a design into graph paper yourself, then you can stick it on a julekuler. 


I'm a big believer in leaving November for my birthday and Thanksgiving rather than getting on the Christmas train early, but for these I make an exception. Onward!

Friday, November 8, 2019

get basted

Oh so not my favorite part of making a quilt. But it's so much easier now in the new craft room, the gift that keeps giving. Instead of trying to do this on a dining room table, or a floor, or the tiny card table, I cleared off the counter-height cabinet and layered everything together there. Having the quilt be just the same width of the cabinet certainly helped since I could literally just stick the halfway line on top of the cabinet for each piece, unfold, and let gravity do it's work. 


There was obviously some smoothing along the way, but it took me less than half an hour to pin baste this and my back didn't protest once. Hallelujah. So now I have a quilt sandwich sitting there tempting me to get out my machine and start quilting. Problem is, while I know what I want to do to quilt it, I'm not sure yet about thread color. More thinking required! 

Wednesday, November 6, 2019

festive pumpkin patch

In keeping with the festive fall nature of my projects, I have some more pumpkins to share. This is a wall hanging (about 2' x 3') pattern I acquired on our recent trip down to the Monterey Bay Aquarium. It took me no time to get it all put together and was incredibly fun to make. 


After Dave, his mom, and I finished a jaunt through the aquarium I mentioned that there was a quilt shop in nearby Pacific Grove. It was literally a 5 minute drive from where we'd parked in Monterey and we found a spot to park just outside the front door. It was obviously meant to be. The place was the best quilt shop I've been in yet. I wanted to take all the fabrics home with me, it was brightly lit, well organized, and there was even a section where they keep a rotating exhibit of quilts going. I was so excited about such a great find. I'd been looking around in the shops closer by for Halloween fabric bundles to make myself some scrappy pumpkins but having no luck. Lo and behold the perfect quilt shop was made even more perfect by having said bundles. Add in a table of fat quarters to choose from and I left the shop with all the materials to make a pumpkin patch of my own with a pattern I also found there. So good. 


I cut the fabrics on the kitchen island one afternoon and got to sewing shortly after. It was really fun to play with all the fabrics and see how the different combinations worked. I especially like the patchwork square pumpkins, but the combination with stripes and uncut blocks of fabric really make the overall pattern interesting. Dave picked out the background, which is a linen-like woven black and gray that I really like. It was finicky to work with but worth the effort. 


I quilted it with gray thread on top and green in the bobbin using random straight lines that mimicked the backing fabric. After auditioning both the green and the backing fabric for binding I chose the black backing fabric and made my own binding. I stitched to the back and then tacked down to the front using a straight line near the edge. It turned out very well and is even kitten approved. Now we just need to find a wall for it to hang on for the rest of the fall season. And I also need to go back to that shop.... 

Tuesday, November 5, 2019

lucky stars, finished

I lucked out on this one. I wanted to make myself a quilt that was the same as the one I made my grandpa for Christmas in 2015. I had plenty of leftover of most of the prints, but unfortunately the background fabric and the remaining prints I needed were nowhere to be found. In fact, all of the fabrics weren't available anywhere I looked, online or otherwise. Bummed out but stubborn, I got to thinking. With the amount of scraps I had of background I could at least make one block of each color combination if I sized down from a 16" finished block to a 12.5" block for a decent sized wall hanging. Serendipity!


Thanking my past self for keeping all the bits and pieces of these fabrics together, it was quick work to piece together the blocks and then get the sashing and cornerstones sewn up. I had just the right size piece of batting in the closet and a good chunk of the metallic deer head backing fabric left. I got both backing and binding out of it, and I even have a bit left over for something else. I miss this fabric especially, please bring it back! 


I quilted the same way I did the original, 1/4" down the sashing and an 'x' through each block using white thread on top and variegated gold/brown on the back. I sewed the binding to the back and then finished it on the front with a straight stitch rather than zig zag so the deer still show. While I miss not having the quilt I made him, this wall hanging is a nice reminder that's cheering up the entrance to my craft room.