Thursday, February 28, 2013

Fun for kitties!

When we got our new kitten a month or so ago, the woman who had fostered him told me about Kickeroos. Basically they are little kitty pillows with furry tails that are fun for them to grab and hold in all four feet. And of course, sometimes to sleep on. They look like, well, this: 


Back in November or so, I started to knit a blanket from random yarns I had leftover in my stash with the intention of having a crazy blanket whipped up and donated to the animal shelter. Every shelter I've gone to has driven home the fact that sometimes animals just need a favorite fuzzy thing to curl up in to make anywhere seem like home. I used the Mirbeau Slip Stitch Baby Blanket pattern, free on Ravelry, randomly picked a width, and alternated colors as I worked. 


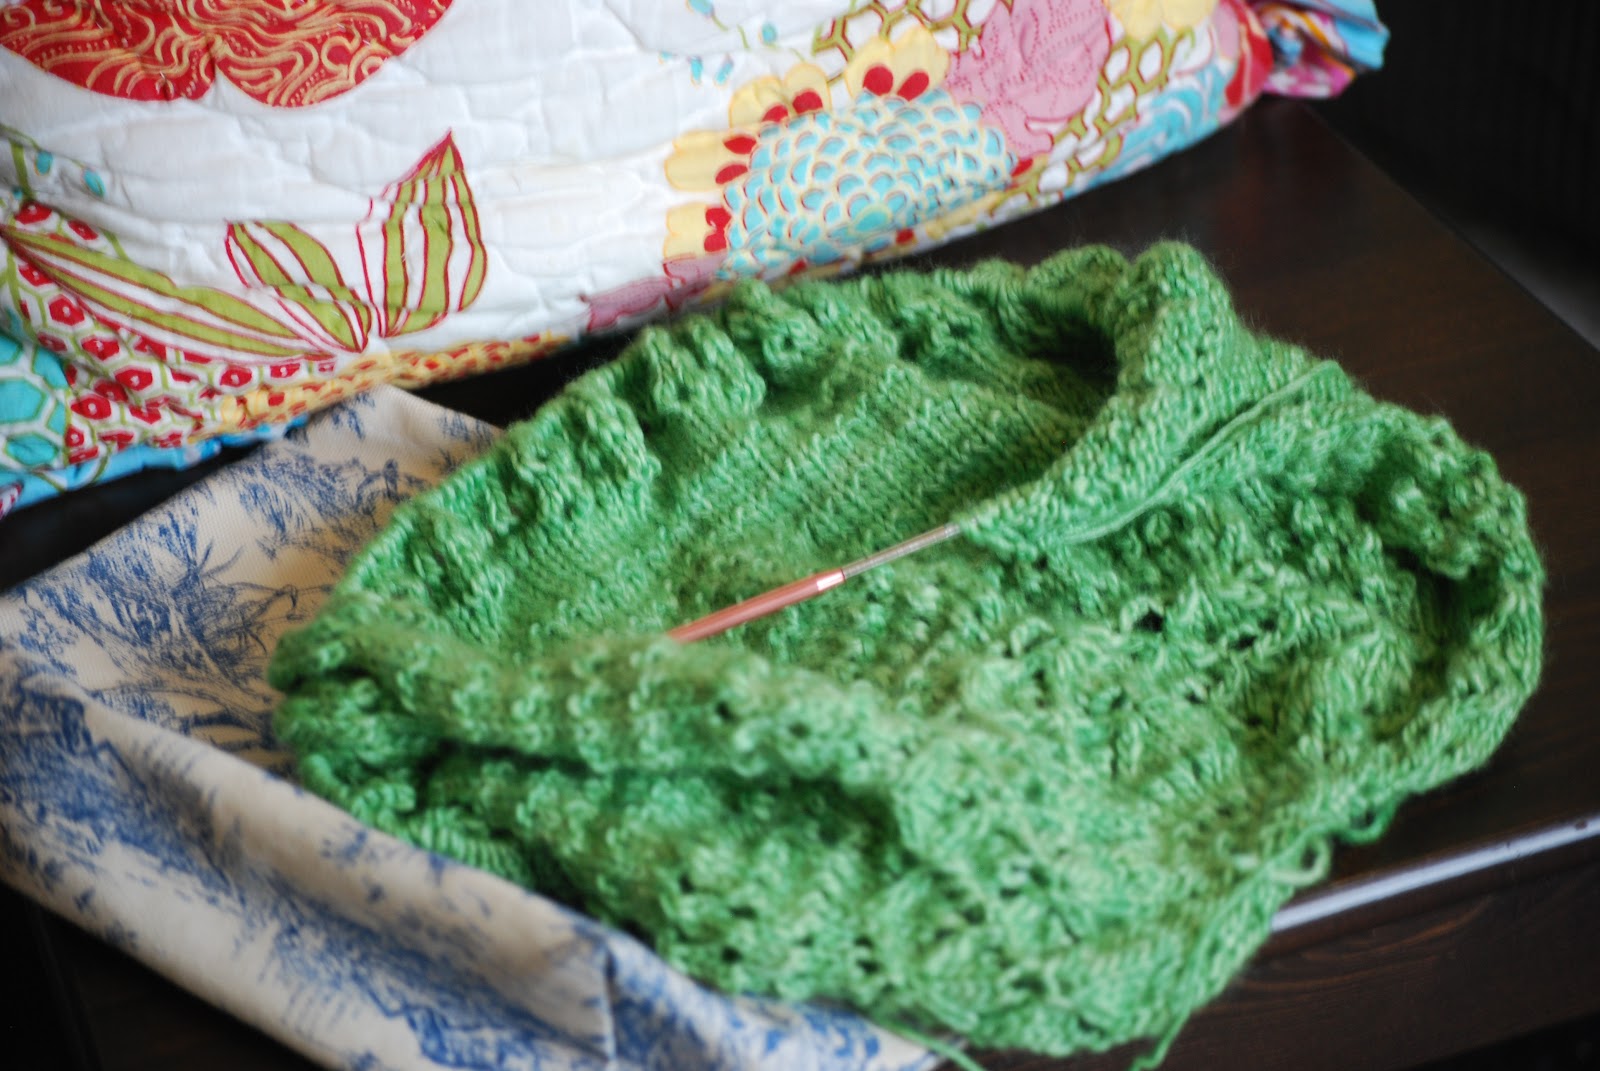
Well, the new year rolled around and I decided to destash and donate most of my unused yarn from the past few years instead of finishing up the blanket. I just wasn't feeling great about the combination of colors to come, even though I'm sure the animals wouldn't mind how the finished product looked. When it came time to frog the progress I had made, I was struck by how perfectly this would turn out as a Kickeroo if I folded what I had in half and put a tail on it. 


I grafted the sides together, then turned it right side out and stuffed it with fiberfil until it was relatively firm but still somewhat squishy (I compared it to my purchased version for Newton). The end was just whipstitched closed. I picked up stitches and knit a tail 12 stitches wide using black eyelash yarn on size 10 needles. 

I'm pretty pleased with how this turned out. I'm glad that despite my lack of enthusiasm for a scrap blanket, that I still have something I can donate to the animal shelter along with the towels we've packed up to go. Hooray for the improv kickeroo!

Friday, February 22, 2013

Just a sip, please

I had a lot of knitting projects close to finished, and this last week I managed to wrap up three of them! It feels good to liberate some of my needles.

Today I'll write about my Absinthe shawl, a semicircular beauty that is about 45" wide and 20" long. I used 2 skeins of Malabrigo Silky Merino in Dill and a little bit of leftover Pradera for the edging. It took me one month to the day to complete, working on and off.


I love the green color. I originally went to the yarn store looking for gray, but came home with Dill instead. The bright minty green was calling me from the shelves. The silky sheen of the yarn makes this shawl pretty fancy, but I think the colors keep it casual.


If I use this pattern again (and I would, it's great), I would actually try using a heavier yarn. It's kind of floaty in this yarn, which is fine but I was hoping for something more substantial. I'm also not sure how I only used 300 yards of yarn when someone else using this exact yarn used 450. Do i knit that much tighter? Oh well, I still like what I have, it just wasn't what I expected. And I have a whole skein of green yarn left to use on another project.


The pattern was Dinner at the Eiffel Tower, and the lacework panels really do turn out looking like the struts on the famous Parisian landmark. Alas, when we went to Paris we didn't have dinner there, but I certainly can imagine sporting this around my neck while strolling down the Champs de Mars. I also did not notice the subtle color variations in the green before taking the picture below, but it is really quite a lovely effect.


When I first wrote about this shawl I said it reminded me of Moulin Rouge, and it still does. The green absinthe fairy mixed with a splash of the Parisian rooftops at night. Vive la France!


Linking up to Finish It Up Friday with this yarny finish.

Thursday, February 21, 2013

Teeny tiny

I found the Newborn Vertebrae pattern on Ravelry a few weeks ago and thought it would be a nice gift to send along with the baby quilt I'm making for my friend all the way across the Atlantic in Switzerland. I have to spoil her somehow! It is a cute little sweater that is designed to cover baby's back and be open in the front. A baby bolero, sort of, only it's full length.

I had some pretty fingering weight yarn leftover from Pacific and Karenina (I decided not to finish those mittens, after all) that I thought would make a nice combination of colors that either a girl or a boy could wear. The colors look rather neon in places -- they're not.


The body of the sweater works up in a breeze with raglan construction and a simple saving of stitches at either end to go back and make sleeves with. The issue I'm having right now is continuing with the sleeves. My cables on the interchangeable needles I have aren't quite flexible enough to make the magic loop technique (which is the suggested work up) work. Or I'm just all thumbs and can't do it. I either need to go out and get a set of double pointed needles in a size 2 or try to use the DPNs I have and just knit pretty tightly.


I taught myself how to knit from left to right on this one. I haven't ever really been fond of the purl stitch and it actually hurts my hands more for whatever reason. So when the twinges started I decided to sacrifice speed for agility and learn left to right knitting. It will come in handy when I try out entrelac, too. It was the perfect project to do this on since it was just one big stockinette party and eventually my speed picked up to be not so much slower than my regular knit stitch.

My least favorite part was picking up all the stitches for the ribbing around the front, but it was really just time consuming more than anything. I think the red ribbing against the deep turquoise is super cute, so it was worth squinting at those tiny stitches for a while.

Wednesday, February 20, 2013

Revisiting Amsterdam


I made a LOT of progress this weekend on my Amsterdam-inspired quilt. I started back in October with picking a pattern and cutting into some of my orange fabrics for the hourglass blocks. It got put away in the flurry of the holidays, and I decided to take advantage of my three-day weekend to take it out and get back at it on Sunday. 


The first thing was to piece together all the little hourglasses I had already made into 9-patch blocks. Rather than mixing up the four orange fabrics together, I stuck with two fabrics for each block keeping one all-orange fabric and one fabric with some blue in it in each set. 


I especially love these bright bright orange prints together. The hourglasses blend together, and the patterns sparkle! What an amazing difference between these two blocks.


This is the true Amsterdam orange we saw everywhere on Queen's Day, bright bright bright. And those little blue x's are just perfect -- Amsterdam's city flag has 3 St. Andrew's crosses on it. Different colors of course, but I'm ok with projecting the city symbols up in the country's colors. 


For the next set of blocks I'm using a different pattern, one that requires 30 degree blades, reminiscent of windmills. I have really gotten quite attached to my marking pen... definitely one of my more useful pieces of paraphernalia. 


The wedges are swapped around and sewn together into big bursts of color. This block has little white kitties on it -- we (I) missed our cat while we were away! -- and the green color is meant to represent the bright green walls at AMOLF, our work place in Amsterdam. It even had a bright green couch!


And here are some bicycle wheels! Self-evident reason, really. The Kumari Garden print looks like splashing raindrops, so it's all tying together rather nicely. This might be my favorite block of the bunch.


In the book, it is recommended that the seams be pressed open, but I decided to try and see how pressing to one side would do. I find that it helps me match up points a lot easier. Of course, that last seam (horizontal in this picture) is one long one, but I found that pressing each side in the counter clockwise direction was ok as long as I let the center bunch "decide" which way it wanted to go before smooshing down with the iron.


And look at those near-perfect points! I may not end up using the yo-yos the pattern calls for on these blocks... all my points match up nice enough that they don't need to be covered up, and if I plan my quilting correctly I won't have to sew through the bulk.


Here are all the blocks finished up, I'd say that was a great day's worth of work! I'm going to set these aside for a bit while I consider my options of getting them together into one quilt top. It will involve natural linen sashing strips, but the details of color placement and whether or not to put something at the  sashing intersections remains to be seen. Maybe some yo-yos to make up for the ones I'm not using on the green blocks? Could be fun... it will be kicking around in my head for a bit. I certainly don't want to rush this one!

Linking up to Work In Progress Wednesday at Freshly Pieced, check out what everyone else is up to!

WIP Wednesday at Freshly Pieced

Tuesday, February 19, 2013

Dutch Geese

This post is a continuation of yesterday's post about February's bee blocks. You may recall from yesterday's flying geese units that I had some little HSTs leftover from trimming seams. Well today I'll show how I used those and more from making more flying geese to add a cute twist to this next block.


First things first, I needed more flying geese. This time around I just made individual units using 5.25" x 3" rectangles and 3" squares and stuck with the low volume prints for the unit backgrounds because I wanted to use a wider variety of prints. I did have a few leftover geese from the 4-at-once approach that I used to make some for the Goose Feathers block, those are the pink tile ones in the upper right and middle. Since I used the standard method for making these new units, I ended up with lots and lots of teeny HSTs leftover. I wanted to do something interesting with this block, too so I decided to include these in the design. After playing around with the bits and pieces in a few different ways what did I come up with? 


Pinwheels! My other option was checkerboard stripes like I used in Mom's sewing machine cover. The pinwheels won out for cuteness. If you iron the seams to one side on the HSTs and as you piece, the points are super easy to match up just by nestling the seams against one another and making sure they're snug. Love it. 


I messed around with a lot of different layouts with the pinwheels and geese units. In the end I just really like the way long strips of flying geese look, so I made two of those and ended up placing the pinwheels side-by-side in one long strip, too. It is interesting that I ended up using sashing strips in both of these blocks when I normally don't think of it. In this case though, I did try sewing the geese and pinwheel strips directly together and it looked waaaay too busy. It needed some negative space, even if just a little. Also because I was flying by the seat of my pants again, I tacked on some black and white prints on either side of the flying geese units to make the strips as long as the pinwheel piece. It's pretty unobtrusive and I can't even see it unless I'm looking for it. 


There is a restaurant near our place that is called the Dutch Goose. They are basically a sports bar type of place, but the food is surprisingly good and varied. They also have the yummiest deviled eggs. So what else would this block be called with its pinwheels and flocks of geese besides Dutch Geese? It ends up measuring 14.5" x 15" slightly longer than wide as shown. 


Here is what I ended up with from the day's worth of work - Dutch Geese and Goose Feathers. I'm really pleased! Dave even mentioned how it is a shame they're going away because he liked them so much, even the colors. I may have to file these away for "make again" though I doubt it would be as fun to do a second time. I say this with many of the bee blocks, but I really can't wait to see how this quilt comes together with everyone's contributions. Thanks for such a fun assignment, Ara Jane!

Monday, February 18, 2013

Goose Feathers

Funny thing about these next two posts... I was intending to put my sewing machine away and clean up the craft room. Before that could happen I decided I should probably get my bee blocks for the month finished. Isn't that always the way -- just one more thing! Our mission this month features flying geese in pinks, aquas, navys, and a low volume background. I've never made flying geese before, so I got to learn a new skill.


I didn't really start out with any sort of plan, just pulled some fabrics and started making units to test out some different methods. I like the four-at-a-time method the best, and while making them they sort of looked like little alien ships all lined up on my ironing board. The benefit of this method is that there is zero waste. I used a 6" square for the center and 3.25" squares for the side triangles.

I found that sometimes I just wanted to make a couple in different color combinations so I used a more standard approach, too. There I used a 5.25" x 3" rectangle and 3" squares. The geese end up being ever so slightly smaller than with the first method's measurements, but the difference could be made up in the seams and really is quite tiny. If you stitch one extra line, this method also gives you small leftover half-square triangle units (instead of tiny, annoying triangle scraps). So while it's technically "waste", they are useful assembled little pieces for other things.


Turns out, if you plan your colors accordingly, flying geese units can be combined to form little chevron shapes. I took these shapes, alternated pink and blue chevrons and fashioned them into feathers. I originally intended them to be oriented in the other direction but the more I looked at them it started to make more sense to have the v's pointing down instead of up. Much more like a feather.


I pieced the strips of geese first then added some sashing using 1.5" strips. The top and sides got plain strips and in the bottom I embedded some tiny black and white pieces to act as the feather shaft. I was pretty pleased when I snapped this picture of the finished product considering I had improvised the whole thing. It ends up being a 13" x 14.5" block. I'm so proud of this one so I've named it - Goose Feathers. Appropriate, no?


After I finished I reread the post from Ara Jane and realized the backgrounds of the geese (i.e. the small triangles on either side of the larger one) were supposed to be low volume, not just the block background. A quick email to double check was sent, and turns out this is just fine. I was willing to keep it and build off of it to make a small quilt (and once I thought about it kind of hoped to *wink*), but I'm so glad it will be ok to include in the bee quilt! 

Friday, February 15, 2013

Blowing in the breeze

I finished this quilt top one cloudy weekend in January and I'm hoping to get it basted, quilted, and bound soon so it can be sent off to the mama-to-be. The pinwheel blocks are really just a bunch of triangles sewn together, so the piecing went pretty quickly after I tested out the first block.


One of the decisions I had to make along the way was how to press the seams. Open would have been quite messy, I think. In the end I pressed away from the large light colored blades of the pinwheels as much as possible to make them stand out more from the front. After all the squares were sewn together I made sure to give an extra bit of pressing to the centers where all the diagonal lines intersect.


I chose to use a more regular color scheme than the pattern (Pinwheels in the Park) called for and I really like the dimensionality the light and dark fabric combinations gives with the simpler scheme. You can almost see the pinwheel folds popping out of the quilt top ready to spin around in the breeze. 


Another major difference in the construction is that I chose to omit the sashing between the blocks. I had intended to include them, but when I had the blocks all out on the floor to judge arrangement, I liked how the lack of sashing created smaller secondary pinwheels in the green background fabric. 


So now all that's left is to get this baby all basted, quilted, and bound. Psh, "all that's left" - right. 

Thursday, February 14, 2013

Bohemian ideals

I love the movie Moulin Rouge. And Paris. And Ewan Macgregor, but I digress. When I saw the pattern Dinner in the Eiffel Tower shawl pattern on Ravelry I figured it was made especially for me. The lacework is inspired by the architecture of the Parisian landmark and quite dramatic looking but simple enough for my tastes. Also, the perfect topic for Valentine's Day because we went on our honeymoon in Paris. Ahhh Paris j'taime!


Meet Absinthe. The green reminds me of the fairy that appears with Christian and his friends as they celebrate the bohemian life in Monmartre with rather more of the green liqueur than is likely advisable. I cast on with this lovely silky merino yarn and have been enjoying every stitch so far!


It is going pretty quickly, though now that I say that I'll be starting on the next panel of lacework and slowing down. One of the stitches is somewhat awkward, and for whatever reason yarn overs on cable needles make my fabric stick at the junction points more. Irritating, but it may just be a fact of life. I may finish this my the end of the month, though. We'll see!

Wednesday, February 13, 2013

Yarn out, yarn in

In January I got the bug - the kind that makes you purge and reorganize. It's common enough in the new year, new beginnings and all that. My closet got it, my kitchen, and *gasp* even my craft room. All in all, the crafts got more of a reorganization than a purge, but I did manage to get rid of some yarn.

Since I've been knitting more and more, I've taken to planning a queue of projects and getting bogged down by my somewhat disorganized yarn stash. I decided to take all the yarn out of my cabinet and put back only what I thought I would use. The rest, mainly partial or extra skeins from other projects or yarn I bought a long while ago and haven't touched since, went into a shopping bag for donation. It took me some time to find a good place to donate believe it or not. One place based in Chicago I really wanted to send off to (they make scarves for the homeless -- it's COLD in Chicago!) only wanted full skeins. Bummer. I managed to find a woman from across the Bay who was willing to meet me at a coffee shop nearby to take my bag of yarn off my hands. The yarn will go to women in a group at her church who knit and crochet for charity. It was fun to meet her and chat a little bit over coffee before going our separate ways. It felt rewarding and satisfying to hand over some perfectly nice yarns to a group who obviously would appreciate them. I'm sure they are doing more good now than they were sitting in my cabinet.

Of course this also called for a visit to the local yarn store.... I wanted to go pick up enough Malabrigo Silky Merino to make a shawl since I liked how Lisa's scarf turned out so much. I was hoping to get a pretty dove gray color, but of course what is in the store is always different that what you may see online. I ended up with this fantastic green sherbet color called Dill. It screams spring, and the sheen of the silk in the yarn really stands out compared to some of the more complex colorways available.


I have also been bumming around Ravelry and liking a lot of striped projects I've been seeing, but most of these are done in yarns that are lighter weight than what I have stashed. Sooooo a quick buzz by the sock yarn led to these beauties: Malabrigo Sock in Fresco Y Seco and Lettuce. I haven't decided which of the stripey projects they'll become yet but I do think the two colors look lovely together and I've got a couple ideas.


Hmmm.... I think maybe I've had enough of winter and am ready for Spring? For whatever reason green has really been catching my eye lately.  (Thanks Mom, I'm treating myself!)

Friday, February 8, 2013

rocky road, indeed

The phrase 'frustrated to pieces' now has a particularly vivid association in my mind. These Rocky Road to Kansas blocks are foundation paper pieced according to a tutorial at Fresh Lemons Quilts and were our assignment for January bee blocks. I just finished them last night!

I want to be perfectly clear, there was nothing whatsoever wrong with the pattern or tutorial. I just had the darndest time with these. I didn't enjoy making them much, and it really stalled my sewing (and blogging, for that matter) for the last few weeks since I couldn't move on to other things until these were done. The paper piecing was just frustrating me for some reason. My triangles would not work the way I thought they should and I unpicked quite a few seams.


In the end, I think they turned out looking quite nice though. The fabrics in the blades are all end of bolts sent out to our circle by Stash Fabrics (thanks again!). Judging by the pictures popping up on flickr, we all got different bunches. I like mine a lot, actually! The colors are just my taste so these were really fun to work with and combine in different ways to get two completely different-feeling blocks. 


These are two of my favorite sections. I especially like the colors in that pie chart fabric and the cute purple Russian doll print. Combining randomly sized stripes of all the different scraps made for a really colorful and playful block. I'm curious to see how everyone's blocks end up looking all together.