Showing posts with label furniture. Show all posts

Tuesday, March 30, 2021

Storage ottoman

This is a cool thing. After we got my comfy corner chair in the bedroom, Dave and I knew we wanted an ottoman to go with it. I had thought about one of those chunky yarn poofs, but in addition to them being basically huge cat toys they are also EXPENSIVE for what they are. I could have tried making one but instead Dave came up with another solution - we could make a storage ottoman together! 


We started it well before my surgery in February and he put the finishing touches on by the time I was able to make it up the stairs and want to sit in the chair afterwards. It is the perfect height to keep my legs out straight in front of me and to support the sore and achy spots. 


We used oak boards for the body and I added foam and some amazing scrunchy velvety fabric to plywood for the top. The top didn’t turn out as squishy as I was thinking, but it is firm and supportive which is nice. Staining took some time as well as finding hardware we liked. These handles are 100% necessary because it is a heavy thing! I’m not sure how Dave would have gotten it up the stairs otherwise.


For some fun and to hide the plywood top I used spray adhesive (which had not so great success, but it’s on there) to put this cute mischievous kitty print inside. We framed it with some more wood so the staples and edge of the fabric are covered. Down in the corner there you can see the felt tabs Dave added to avoid the top thunking closed. Even with the two hinge brackets we used it still wants to close pretty quick because it’s a bit… substantial. 


I lined the bottom with a heavy duty felt that makes it look quite polished. In addition to being a great thing to sit on to put on shoes, to rest legs on post surgery, and to generally enhance chair reclining comfort, it is a great place to store all of my physical therapy paraphernalia! I’m still impressed that my foam roller fits in there perfectly. It certainly wasn’t purpose-made, but looks like it. Go us. 


Monday, July 6, 2020

week sixteen

Dave bought wood for this project just days before our quarantine started in March. Of course we didn’t know then that we’d be at home for so long, but it turned out that this tack locker was a great project to keep us occupied in the early weeks of the pandemic. It’s been functional since mid-May and got it’s fabulous trim treatment in June, but this weekend we put the final icing on the cake with the bee decals. On the 4th Dave bbq’d on the driveway while I fiddled with a popsicle stick and the bee. 


I’m super happy with how it turned out. It fits (nearly) all of my barn stuff and keeps me organized and contained so I’m not looking in five places for things to grab and take with me. I especially love that we finally found a home for my random assortment of drawer knobs from Anthropologie. Along with the wall paper we chose, they really make the whole thing quirky and very ‘me’. 


There are cubbies on the bottom where I have room for blankets and saddle pads, and a nice big area under the saddle rack where I can keep my barn bag with all my grooming tools as well as a wash bucket behind. The shelves are all lined with a clear plastic shelf liner we picked up at Home Depot, and that has worked really well keeping the paint from getting scratched up. 


We modified the right hand side of the bottom cubbies to have a cut out so my helmet/boot bag could slide in and be stored. That’s way better than having it floating around the garage to catch sawdust. There’s still a half shelf in there where I keep a box of more leather cleaning things. 


This wall paper was totally worth the expense. I found it on Spoonflower and it’s pretty perfect. We even put some of the extra up on the panel in the right hand door so there’s a sassy little palomino looking out from between the bridle hooks. It was quite easy to get in there, though I did have some apprehension about it, and it’s stayed on really well so far. Instead of the wooden saddle rack in the design I opted for a metal one that we just bolted through the back panel. 


The vinyl bee decals were purchased from a vendor on Etsy. They’re pretty perfect and I think just what Dave had in mind when he first suggested doing a painted or vinyl design on the doors. Hopefully they’ll stick on for a while; the rough wood isn't’ exactly the perfect substrate. If it starts to become an issue a layer of clear coat might be in order. 


Very fun project for this year and a really great way to spend some time in the garage doing some woodworking with Dave. Brought back memories of building sets in high school, for sure! 

Sunday, January 4, 2015

I'm finally done reupholstering a chair!

Well this is a blast from the past, indeed. If you recall Dave and I lovingly (stubbornly?) began reupholstering a chair and the end of LAST January to use in my Sacramento digs. Here's where we left off:


Looks great, no? I thought so, too and so kept putting off actually attaching the last pieces to cover the back and finish the bottom. After all, it was in a corner and I could sit on it. It wouldn't really look any different to the casual observer. *grin* I'm not gonna lie, it was well used in just this state. 

Fast forward to today and I've moved back down to Palo Alto with the chair in tow. Dave and I really ended up liking it, so we didn't sell it with the rest of my furniture from up there like we thought we might. Turns out, we don't have a great place for it at home, but Dave thinks it will be perfect in his office at work. But…. about that back…. it's been hanging out in our office here waiting to be finished. Ta da! It happened today. Funny, I remarked when we began this that I didn't want to be finishing it a year later. I guess I win on a technicality of a few weeks. How well do I know us?


In a fit of unprecedented productivity this weekend (I'm not really joking, we even organized our coat closet) Dave and I found ourselves back to wielding the staple gun and verbally cajoling fabric into place. Literally all we needed to do was cut one last panel of fabric for the back and figure out how to get the edges wrapped around the pointy strips of metal that hammer into the sides of the frame. Thankfully I still had the "pattern" pieces after all this time. The creases gave us hints as to how and where to get the fabric wrapped on the nail strips as well as made it easy to cut an appropriately sized and shaped piece.


We are definitely not professionals, or anything close to proficient, but considering this is our first upholstery job I think it looks ok. There are a few places near the bottom where I wish the fabric wasn't quite so loose but those nail strips were really a bear to try to deal with. I think we did the best we could. I'm still glad it's the back! 

Where the original had covered cording all the way around the bottom, we stapled the bottom black sheet back on and omitted the cord. To cover where the edges of fabric meet the legs I improvised little tabs of fabric. I just took a rectangle and folded the edges in so they would mimic the hotel corners on the front and hot glued them into place. They look like little tailored tabs and are a simple solution to cover up the messy bits. 


We are quite tickled with the result, and Dave is excited to get it to the office. I'm pretty impressed with our team work on this. It certainly isn't a project I could have accomplished on my own, and I think Dave even managed to have a bit of fun. After today's effort it looks much the same as the picture up above but now it's completely finished! And Kepler-approved. 

Monday, January 27, 2014

I'm still reupholstering a chair.

Once the chair was stripped, we used the old fabric pieces as patterns to cut out our new fabric. Instead of making the bottom out of several mitered panels the way it was originally done, I just cut out one big piece of fabric, draped it over the whole bottom of the chair, and wrapped it like a present. I did 90 degree 'hotel corners' at the front to deal with the extra fabric, and as a bonus I now know a new way to make my bed.

By the end of the night (11:30 or so) we had the bulk of the chair recovered. This was the point where Dave got to sit back and relax, because I did all the cutting and sewing. Though he did take the piping out of the original casing and also got me to stop stressing out about the fit of the back not looking perfect before we actually stapled anything down. I was pretty amazed at how the whole thing took shape really nicely once we started fixing everything to the frame. Pinching, shoving, pulling, it was all fair game and went really quickly!


The only part we didn't manage to get done that first day was putting the back panel back on. The irony of the situation was that the arms are attached with bolts. Despite the sheer number of sockets we have to go with our socket wrench, and even that Dave asked if he should bring them up (jokingly….), our socket wrench was happily down in Palo Alto. Dave tried valiantly to reattach the arms using the pliers we had on hand, he did in fact get them off that way, but no dice. We called it a night and decided we wouldn't be sitting on the chair until we could tighten the bolts properly.


I had a three-day weekend, but Dave was back at work on Monday. I took advantage of my free day to tackle the cushion. Having sewn lots of pillows by this point, making the cushion was a breeze. I opted not to include the piping in the replaced cover partly out of laziness but also because I think it looks better without. I did manage to reinstall the zipper properly and got everything sewn together uneventfully. The cushion was basically a top and bottom piece sewn onto a continuous strip that serves as the sides. I did notice that since I sewed the top and bottom on in different directions (clockwise, counter clockwise) that the cushion has a little bit of a 'slant' to it, but I think that I'm the only person that is ever going to see that when looking at it. I was just so impressed I got the zipper back on and the cushion in it that I'm willing to overlook that tiny detail. 


So after Day 2 of reupholstery we have a chair that could totally pass as done when put in the corner! You can't even see the fact that there's no back or bottom panels. Plus, don't sit in it, you might end up on the floor! Still, this is pretty much what it's going to look like even if the final touches aren't quite done yet…. part 3: the finale coming soon.

Sunday, January 26, 2014

I'm reupholstering a chair.

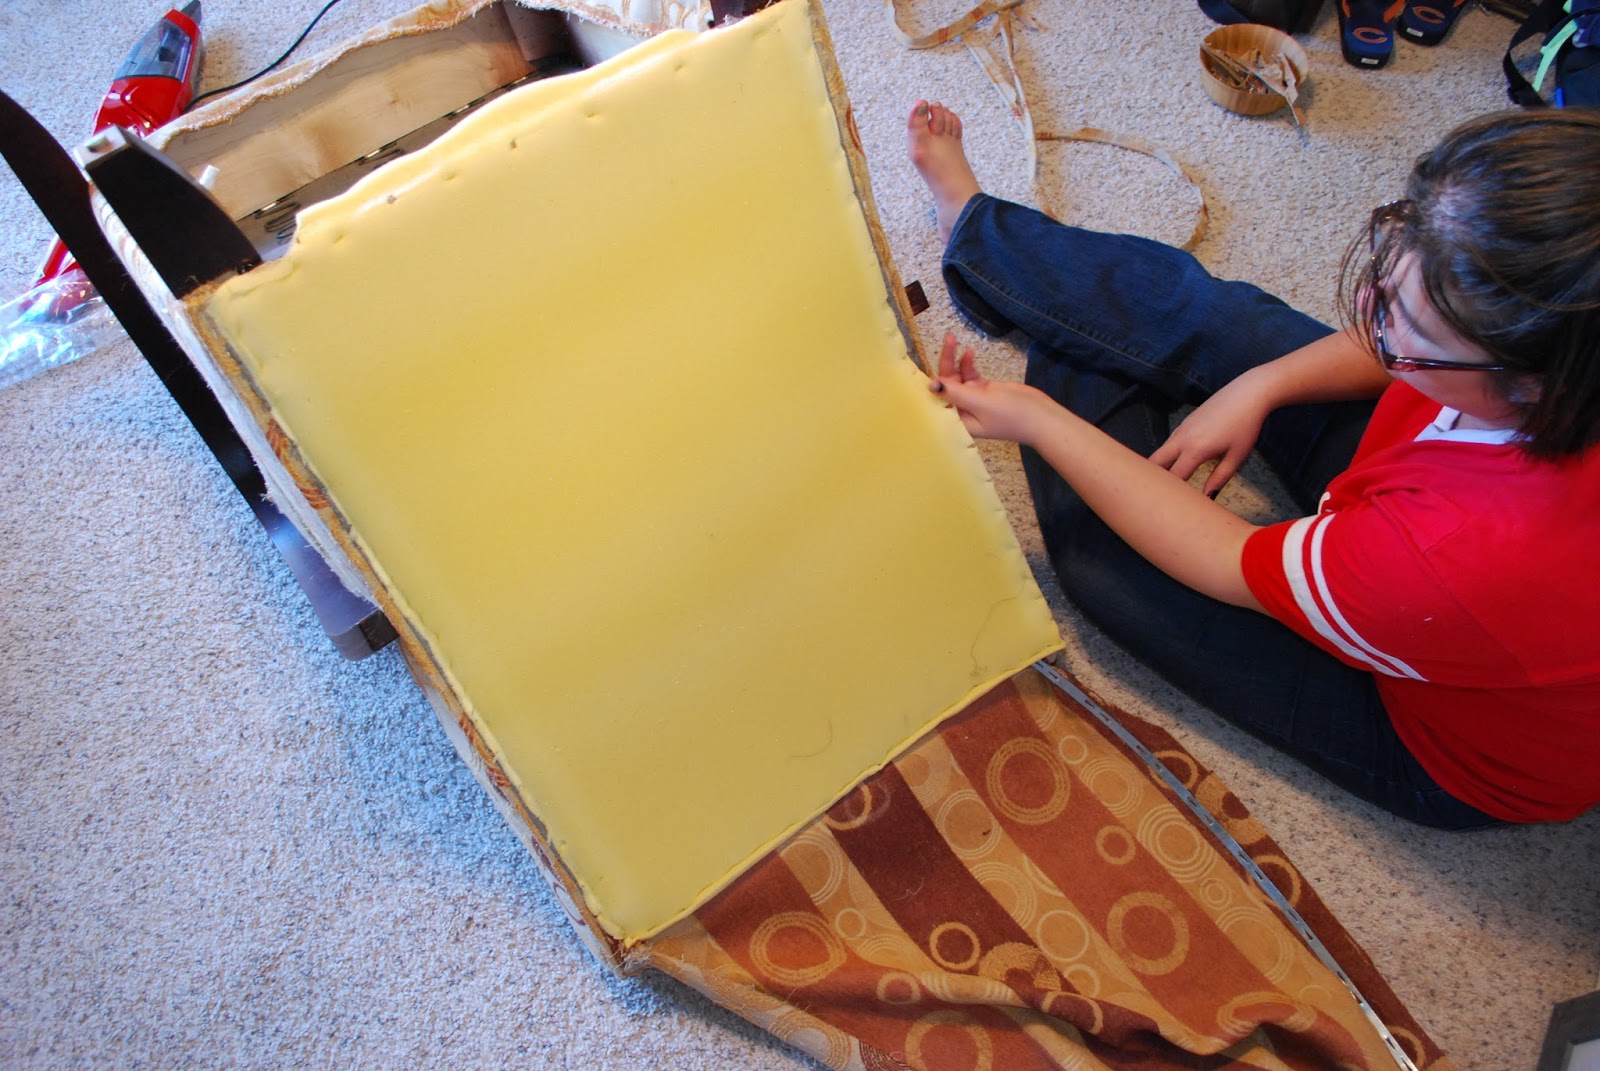
I've got this chair. It's been around quite a while and the cats (Jack, mostly) have really done a number on it over the years. The back panel has been hammered back on more than once, and the fabric at the corners looks like the silks on corn. It ended up being one of the pieces of furniture that came with me up to Sacramento on the condition that I would redo it to fit in with whatever decor I ended up with, because yellow and brown certainly wasn't going to be it. I found some classy looking brown and gray tweedy upholstery fabric at Joann's on the clearance table (for like 4 bucks a yard…. serious bargain) and it's been sitting in the corner with the chair ever since I moved up here.


So, last weekend I bit the bullet and started. By 'I' I mean 'we' and by 'we' I mean Dave and me. Neither Dave nor I have ever really done this before, but we figured oh what the heck how bad can it be. Let's have fun with it this weekend! Well…… I could definitely see how folks less stubborn than us would have stopped midway and just bought a new chair. We actually did end up having quite a bit of fun together, but we both agree that we would think long and hard before doing it again.


Dave took copious amounts of photos as we deconstructed so we could remember how to put everything back together. I think taking them forced us to actually stop and think about how everything was put on so we didn't really refer to them later, but I'd say even if you don't end up using them, having them is a good back up.


The other important thing to keep in mind is to be nice to the fabric. I made sure to label all of the fabric pieces as we took them off and we resisted the urge to just rip things off before looking at how it was attached. Even then, there was no ripping because I wanted to use the old pieces as patterns for the new ones.


The number of staples in this chair holding everything on was astonishing. And we pulled out every. single. one. By the end of just the bottom of the chair both Dave and I were pretty sore in our hands and shoulders from wrestling with the tiny pieces of steel. We soldiered through, though, and were rewarded by a stripped down chair by the early evening (we started at 11 am). After which we took an Advil/dinner break. More on stage 2 in the next post...