Showing posts with label baby. Show all posts

Tuesday, March 3, 2026

girly quilt for a colleague

A coworker is expecting, and I know her well enough to feel comfortable asking if she would a) enjoy having a small quilt from a coworker and b) if girly colors and patterns were ok to use. Happily she said yes to both so I got to have a lot of fun putting this piece together. Pulling fabrics was, of course, the best part. I started out thinking I was going to use an entirely different cat fabric with bright colors, but as I pulled both from my bag of scraps I've precut into charms plus some of the pinks and floral fabrics in my stash, I gravitated more towards the softer palette here with purples, yellows, soft pinks, and neutrals. 


I knew I wanted to make something relatively simple because I didn't have much time (said coworker was going to be in town for just a week). Some creative googling led me to a tutorial on the Diamond Chain pattern at Missouri Star and followed that (loosely) to make the center panel. It looks the same, but I didn't follow the specific sewing instructions since I wasn't starting from the precuts that were shown. 

Despite including lots of yellows and purples, it was still feeling VERY neutral and kind of washed out, so I played around with some of the prints and decided to add stripes at the top and bottom. That really changed the character of the whole quilt. The purples popped much better and the yellows sparkle around the pattern instead of blending in. Very pleased with that decision!


I had exactly enough of this wonderful ric-rac stripe print for the binding. If that's not the universe saying "great choice!" I don't know what is. Aaaand it's pretty perfect. I'm finding that working with fabric collections is fun, but my real joy is in these types of projects where I can assemble something cohesive from different fabrics I've collected over time, even better if I use scraps! Some of these are offcuts from trimming quilts after quilting, one is a blender my mom sent from her stash (so quite vintage!), and of course because it's me there's some unconventional texture in there in the form of flannel. Usually it's linen, but here there be flannel kitties. 


The backing is just a couple of large leftovers of a couple of the prints that are pieced together. I quilted it with gray thread and a simple cross hatch in the center panel and "in the ditch" along the stripe seams on the top and bottom. It ended up being 32" x 44". It was a gorgeous morning today, so I snapped a couple pictures outside before heading to work with quilt in tow. I'm pleased to report that it was well received. 

Tuesday, September 12, 2023

quilt in a week

My cousin is having a baby soon, and mom wisely suggested I sit down in my sewing room and try to make a quilt. The creativity hasn't been moving too well for a long time and the stash cabinet has been neglected, but it was fun to sift through and find some beautiful things. 


This fabric was an extra from an order at the height of the pandemic (from Hawthorn Threads maybe?). It's quite a nice, thicker weight cotton with just a small amount of sheen and was meant to be a pre-printed pattern to cut out to make kitschy masks. Well, I didn't do that since I had a lot made already, but I did like the prints so it got folded up and stashed. 


It was relatively quick work to cut things out, rearrange, and sew them back together in simple patchwork style. The colors are really classy together, so I had to add these quirky kitties on the back to lighten up the mood a bit, and I used a really pretty pink, gold, and gray feather print for the binding. 


Saturday, January 30, 2021

Quilt fort

January is finishing up and so am I. This fun project came as a special request from my brother for my nephew. I had a lot of fun playing with fabrics on this one.... so much character, literal and figurative.


The challenge was “hey can you make like a hanging thing I can put around my desk so the little guy has a hidden room down there?” Like a quilt fort? Yes, yes I can. Basically I made a short, wide quilt that is long enough to wrap around the dimensions of the desk he had in mind and a couple inches shy of the height from desktop to floor. I sent some sticky Velcro tape along with it so he could customize where the anchors were based on the obstacles/potential anchor spots on the desk architecture. 


Serendipitously, I had a couple of Star Wars prints sitting in the cabinet: one colorful print that I just looove and one black and white Mandalorian print that Mom recently found. Hurrah for the remnants bin at Joann’s! I pulled a bunch of fabrics from my scrap pile that I thought coordinated well with the retro rainbow and hemmed and hawed until I had a good combination. Of course leftover Minions had to make it in there, and I even got to use an orphan block from a really cool quilt I made a long time ago for a wedding present (that red and yellow patchwork). 

For the pattern I decided I really wanted to pull something from one of the many quilting books and magazines I have on my shelves. Not that I’ll stick with this intent, but I’m hoping to work out of my hard copy books and patterns more this year both for sewing as well as knitting. We’ll see how it goes. The pattern I chose was out of Fat Quarterly Shape Workshop for Quilters. I modified it a bit to serve the dimensions I needed and the fabric on hand, and I changed up a couple of the squares to be solids as opposed to square-in-a-square, but the inspiration was definitely from the book. I added (what else?) linen to the top and bottom to make up the height I needed as well as to serve as a bit of a visual frame and a fun yellow polka dot print to the ends to make it long enough. 


I thought for a hot second about making a second pieced panel for the back and then thought better of it. I have FINALLY used up all but a small rectangle or two of this green swirly print. It started out life as a duvet cover from Ikea and has been extremely useful in many projects since it was retired to my fabric stash. Don’t get rid of your old duvets, people. You obviously loved the print/design/colors when you bought it and there’s so much fabric there! As long as they are still in decent, non pilled, non gross state of course. 


Quilting and binding went along uneventfully, especially since I got those little clips to hold on the binding as I sew (which you can see in the picture above). I swear I don’t hate binding as much as my face suggests. For the quilting I echoed one of the prints in the quilt, a navy with waves of dots, and did the preprogrammed wave pattern from my machine. The front got orange to pop on that retro Star Wars print and the back got yellow. Look at the Darth Vader and Storm Trooper heads. Isn’t that awesome? I know. 


I’m really happy that my brother thought to ask me to make this. It’s always fun to make for other people but it was especially fun to make something that was actually requested!

Monday, February 24, 2020

Scrappy Happy quilt, finished

Well that didn't take long at all! Even given that it sat around basted for a while, I got this quilted in just one day and put the last stitch in the binding the day after. A+ for me, it is done WELL BEFORE the baby arrives. I knitted a blanket for Cindy's last baby and got a cute picture back, so I'm hoping she likes this quilted blanket for baby #2 and also sends me a cute picture again. 


I was going to use my new quilting gadget that Dave got me to free motion quilt better, but I forgot that it doesn't actually require, in fact will not allow for, a basted quilt sandwich. Using that means I roll the three layers separately and quilt that way. Ooooops. Well I just decided to free motion quilt anyway. After all, many years ago I did a whole quilt in dogwood flowers that way, so why not give it another shot? Instead of a regular pattern I wanted to do loops. To make it easy on myself I did rows of loops across each row of squares in the quilt top, with two rows of loops to cover the flying geese that go horizontally. 


The nice, and unexpected, thing is that when you look at the overall quilt it just looks like it's got a lot of texture and loops everywhere. It doesn't look ordered into rows at all, which is super great because - ahem - it's not quite as regular as I'd envisioned it being. Between having the foot installed wonky the first time (or two) to bumping the rolled up quilt into the window sill behind the machine, there are more than a few hiccups in the stitching but you'd never tell if you weren't looking closely. I'm sure baby won't mind. 


I found this great polka dot fabric in my stash and used up what I had to make binding that I machine sewed to the front and then hand sewed to the back. Normally I zigzag stitch by machine to tack binding down, but I've been on a hand stitching kick lately with the embroidery project I've been working on and hand stitching the binding seemed like it would be fun. It was, and the polka dots are much more visible than they would have been with white zigzags overlaying them. 


The quilt is a 41" square which is a nice size for a kid to toddle around with or to lay down on the floor for a play mat. It was also a good size to work with in the machine. I'm particularly proud of the patchwork panel on the back that used up every. single. scrap. of the fabrics I used in the front. It started out as a bit of play, actually. I wasn't sure what it would turn into but just kept sewing bits and pieces together until this came out. When it was done, I decided it would be a nice addition to the back. This whole quilt, with the exception of the batting layer, was made from scraps and small bits of yardage I had in my stash. There were no large cuts involved and it was really satisfying to end up with basically no leftovers. It's the perfect scrap buster project. Isn't it gratifying to find out what the little pieces in your scrap jars will turn into?

Monday, January 27, 2020

Happy Scrappy quilt top, finished

Today I finished my first quilt top of 2020. After sewing everything together I have a square of about 41", a very good sized baby blanket. I am enjoying the somewhat scrappy, somewhat ordered look of this so far. 


Happy to report that despite my griping, the trimming was totally worth it. My points all lined up effortlessly and all of the sections were well behaved as I assembled them into the larger whole. I sewed each quadrant of HSTs together into rows first then added row to row until the 4x4 square was complete. The flying geese panels went together quickly, and then I just attached the top quadrants to its geese panel, same with the bottom, and then the middle square in one long strip between its two geese panels. Then those three pieces got attached to make the whole thing. I did pay attention to be sure my seams and points were lined up and well behaved, but it didn't take much. Thumbs up. 


I took some of the leftover pieces and improv pieced my way through a back. I started with the smaller scraps of prints and randomly pieced them together with minimal trimming. That resulted in a very cool looking patchwork panel that I then added larger scrap pieces to until I had a 44" square back. There is a nice big section of the gray dotted flannel on there, so it should be a cozy little blanket. Basting, quilting, and binding left!

Saturday, January 18, 2020

trimming down

Trimming blocks is the least best part of quilting. I say that because quilting is all pretty great, but I've never really loved trimming things up. We try to be perfect about it, but with ruler wiggles and seam folds and all the "reality" involved in making these things we draw out on paper, is there ever really a perfect block? Regardless, I trimmed. 


Obviously the flying geese required trimming, and this handy dandy ruler I got for my birthday this year really makes it quite doable and fun. Cut 1-2, flip, cut 3-4, done! More of these in my future, for sure. I've always wanted to make an all-flying-geese quilt. 


Squaring up all of those HSTs was less fun, but no less important. I've always kind of winged it and trusted that I could make adjustments as I've sewn, but really why not just do this very simple thing and give myself a better chance of everything lining up without fudge? After trimming up all of these blocks yesterday, I will say that having the space to spread out and the right height work surface (the counter height cabinet) makes it not at all terrible. A ringing endorsement, indeed. 


Wednesday, January 15, 2020

getting scrappy

There's a quilt project brewing in the craft room again! I had a fun time scrap diving to find these big pieces of warm and cool fabrics. I had forgotten I had all of these, to be honest. I have jars of scraps on the shelves with smaller bits, but my opaque can full of these larger cuts has sort of travelled with me in relative anonymity. 


I also found some leftover neutral fabric and enough linen pieces to end up with enough background squares for my half square triangles. Originally I thought about making the HSTs half cool and half warm, but after finding the perfect amount of this off white, I figured I'd use it. Also this way there will be more visual space in the quilt.


I am improvising this based off of a design I came across on Pinterest. The Pinterest link didn't work (so many of them don't anymore!) but through some determined googling I did end up finding the original designer of the quilt who posted the piece as part of a blog hop to celebrate the release of that year's Art Gallery Fabric line, Etno. 


I don't have any measurements or anything to go off of, but the pattern looks to be just flying geese and half square triangles with a single center square. I did just get a flying geese ruler for my birthday, so I just chose the biggest size it would make (4x8 inches, finished) and went from there. Any quilt block is adjustable, really, and half square triangles are probably the easiest to make any size aside from just cutting squares of fabric out. So, these are 4.5 inch HSTs and flying geese that are 4.5x8.5 inches before sewing together. They'll end up 4 inch and 4x8 to give me something about 40 inches square. 


The middle square is an on point block that I swear I did the math correctly on to get it to be 8.5 inches unfinished, but it ended up as an 8 inch block instead. There was enough of the geese fabric left over to just add some strips around the outside to make what will be a very pretty border on that square. I think it will look even better than I planned. Love it when that happens. All it needs now is some trimming and assembly. Not bad for an afternoon's work!

Thursday, May 30, 2019

aidin, finished

After setting this down for vacation, it took me a few weeks to pick it back up again when we got back. Of course, in the meantime my nephew was born giving me the ‘ooh better get this done’ moment I needed. All I had left were the long side borders and it didn’t take me long once I got hookin’! This was a free pattern on Ravelry, and I have to say I’m thankful to the designer who put all the work into this and then shared it. It makes such a nice piece.


It ended up being a good size, about 36 x 44 and quite a hefty weight, which I am really pleased with. Crochet fabrics are denser compared to knitting as it is, and the mosaic crochet adds more density per square inch making for a nice thick and sturdy fabric. That said, this cotton yarn from Scheepjes is not as stiff as the usual balls I get from other brands and that makes for more drape in the finished project. It was a little splitty to work with, but what cotton isn’t? I definitely appreciated the wide range of colors I had to choose from, and I love this combination, which is a slant rhyme to nautical colors and hopefully will stand up to wear and tear. At least being cotton it will be easy to throw in the wash. 


I’m hoping the high contrast in the zig zag section will be good for the little munchkin’s eyes and give him something interesting to stare at as he explores the world around him. Rather than doing the last round in the teal as the pattern called for, I used the gold since I was running low on teal and had the most gold left. I squeaked by using up the last of gold and just a few yards of the English tea. I only have about 20 yards each of the teal and tea leftover, so I’d say I made a good choice!


I’m very happy with this finish and am looking forward to seeing my nephew bundled up in this as he grows up.

Pattern: One Step Beyond Blanket (my Ravelry page)
Yarn: Scheepjes Cahlista in ‘ginger gold’, ‘dark teal’, and ‘English tea’
Hook: H (5 mm)
Size: 36”x44”

Tuesday, April 23, 2019

mosaic momentum

I’m making pretty fast progress on the baby blanket. It’s been traveling around with me to coffee shops and hanging out with me on the couch while I watch all the spring tennis. 


It’s not one of those things I can just zone out and work on, but I’ve hit a good rhythm and am more than 2/3 of the way through the center zigzags. I’m still pleased with the color choices I made and believe I am tracking to have just the right amount of yarn. Onward!


Wednesday, March 20, 2019

more mosaic

I’ve been enjoying a return to crochet lately. I’ve also enjoyed starting a bunch of new things. And (ahem) acquiring more yarn. This new project ticks off all three of those boxes at once! I have a nephew coming this summer and I decided it was the perfect time to try out a crochet blanket pattern I found recently. It might seem ambitious, but I think it will actually go pretty quickly! 


Picking out colors for a little boy was SO FUN. I ended up with a slant rhyme to nautical yellow and blue. While the teal and mustard are not what I’d call bright, they are still saturated and vibrant. The natural colored background (Scheepjes calls it English Tea) color sets them off well and hopefully will hold up better than white. I wonder, does “English tea” suggest the color of a cup of tea, or that the yarn was dropped in tea and rescued? It makes me chuckle as I work to think of fishing yarn out of a cup of tea. 


The Crossroads Throw I finished was so fun that I went searching for other mosaic crochet projects on Ravelry and came up with this pattern. The center panel will be the teal and tea waves, and there is a border strip with the mustard ‘snake’ all around the edges. It was a little slow getting started and reading the pattern, but now that I’m used to it things are moving along. 

Thursday, January 3, 2019

poulet quilt top

Well I guess I really was excited to work on that new quilt! I found myself on a quilt-venture from mid morning to mid afternoon today. And it was fun.

Dave is going to visit some friends who are expecting, and he wanted me to make them a baby quilt from us. What a compliment, thanks hubby! After some perusing around on the great world wide web  for "chicken quilt" (chickens are part of an ongoing joke with these friends) I found a quilt I really liked on a blog called Quilty Love (link). The whole thing is chickens! The original and easy to follow tutorial she used for the block was at another blog (here), but I link the first quilt as well because it was the bright colors and fresh setting that really caught my eye and inspired me to make it.


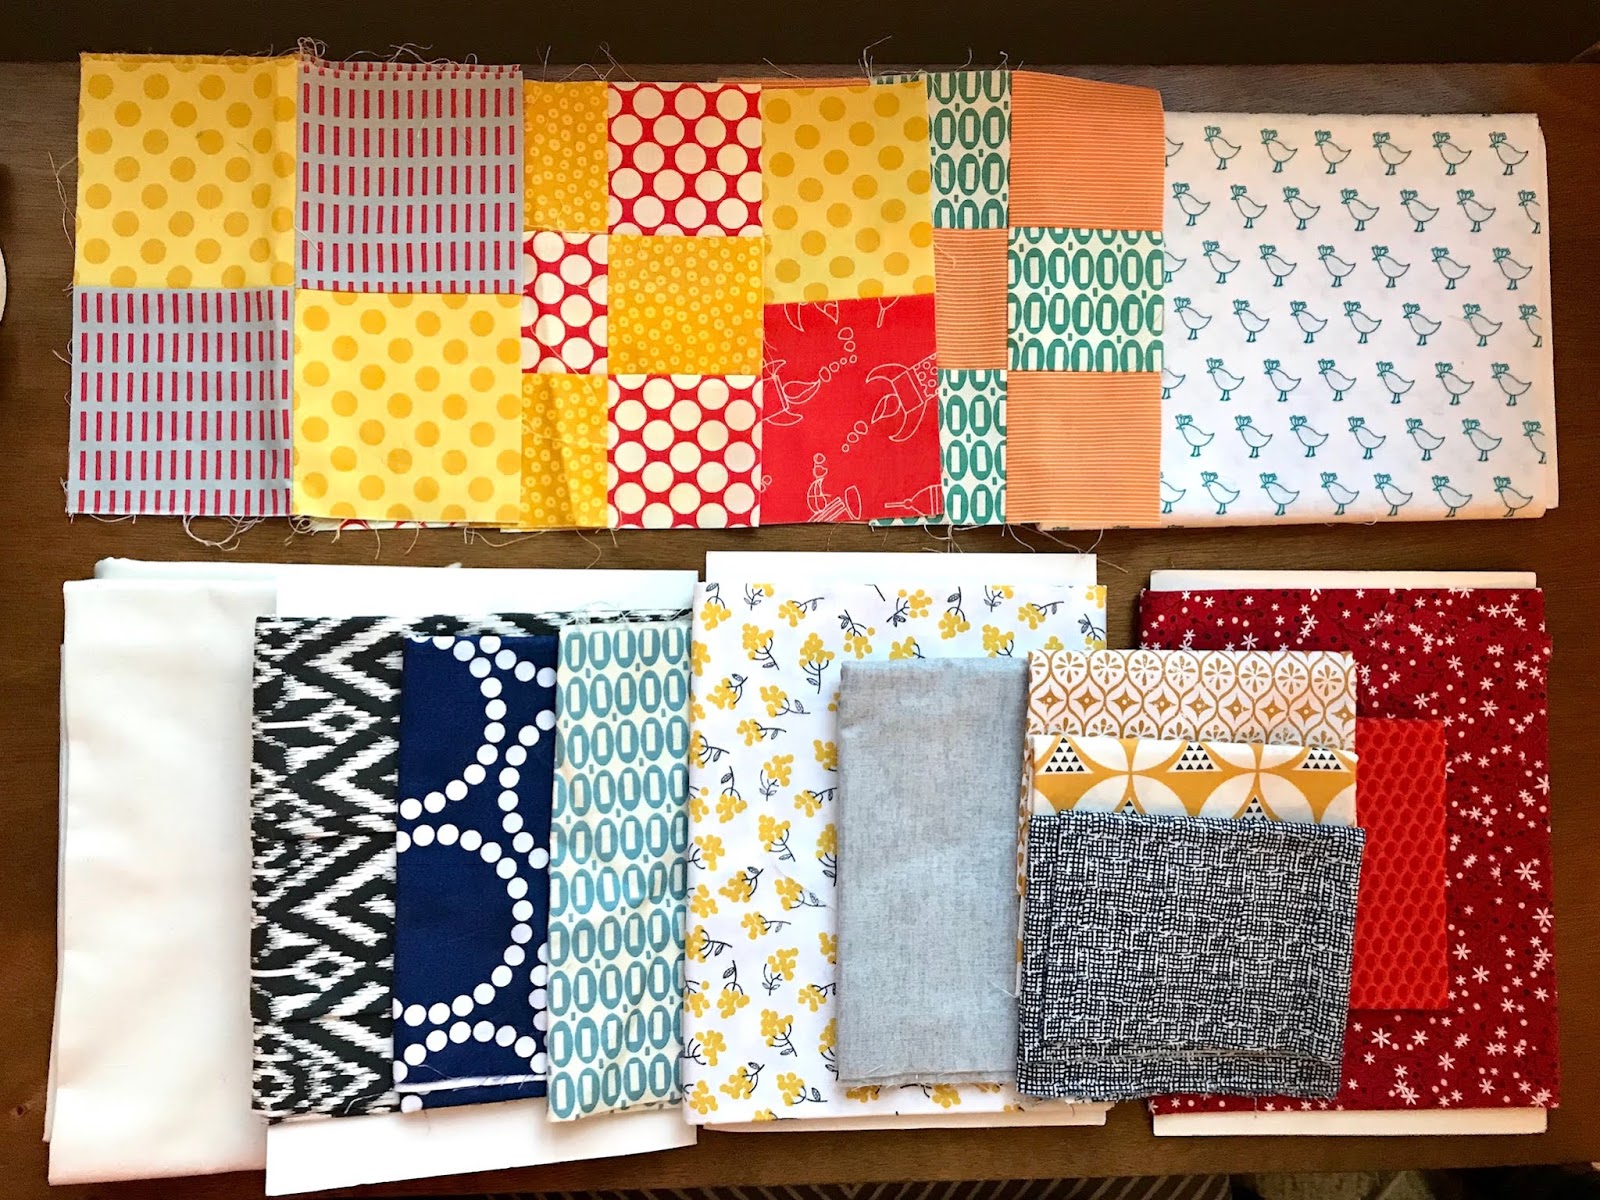
We pulled fabrics together a couple of days ago and in the process of moving my supplies from closet to cabinet we also found some leftover blocks from an old project that seemed like the perfect fit. We're going for primary-ish colors. Dave really liked that bird print at the top right for the backing, so I pulled in one print with similar colors for the front and that also made that orange and turquoise nine patch fit in better, so it got added in too.


The cutting didn't take very long, which was good because it's my least favorite part, nor did it really take up that much fabric. With the largest piece for each block being 5.5" x 6.5", this is a great project for leftover odds and ends. I have no idea what the exact color name for the background I chose is, but I'm sure it's a Kona solid and it is off white. I happened to have a bunch of it on hand; thanks, past self! 

The blocks came together surprisingly quickly, and before I knew it I had a flock of chickens on my hands. I really liked the simple construction - just a few seams and a nice big piece to show off fun prints. Also, the design is just so cute. I feel like each chicken has its own attitude. Being able to freehand cut the combs is part of it, but also the way they are standing they're just proud little chickens. So fun. 


I hemmed and hawed over the quilt layout for a while. I wasn't certain how big I wanted it to be. In the end I figured eight chickens plus the four other blocks was enough if I used wider than usual sashing. This decision was helped along by just throwing the blocks on the floor and moving them around until I was happy. I thought to myself "hmm how big are those gaps? maybe i'll just make my sashing that wide." They were about 3" and the overall size with all the blocks spread out seemed big enough so I went with that. Then the next question was to square or not to square? The orphan blocks are 8" squares, but the chickens are 7x8". I thought about adding a strip of background on the bottom of each chicken to square them up but then decided it would be less annoying to trim the patch blocks down to 7x8". 


I deliberately chose to make the longest piece of sashing the horizontal ones and to piece the vertical ones in order to emphasize the slight rectangle-ness of the blocks. I also set the directional fabrics in the patch blocks to be stretched horizontally as well. I really love the way it turned out! The squat little chickens and their patchwork friends look very hip and modern despite the traditional setting. I liked the way the inspiration quilt looked being completely chickens, but I really think those orphan blocks found a great home in this quilt and give it that extra bit of quirk that I love.