Showing posts with label wall art. Show all posts

Saturday, August 1, 2026

scrappy rainbow gallery wall hanging, finished

This piece has been hanging on my design wall for such a long time patiently waiting for binding inspiration to strike. 


It finally came in the form of the rejected borders on the mushroom pillow mom and I started. The strips were just the right size for a binding and, despite being linen and bound to be finicky to work with, were pretty perfect for the job. This felt like a nice project to start off the month and get me back to sewing a bit. 


I can't remember when I decided that hand sewing binding on to the backs was preferable to doing a zigzag on my machine, but it is a very strong preference now. I used to do it all the time, but it feels so cavalier to think of machine finishing a binding now! I also remFunny how we change over time. 


It's done, and looks so good. The teal binding pulls out the green-blues in the middle and emphasizes them more, which I quite enjoy. The irony is that I'm not sure where I'm going to hang this, so it's back up on my design wall but at least it is finished! 


I remember the first night of playing with squares, the frustration of dealing with that black coarse linen for the sashing, and the joy of deciding it didn't matter if it was perfectly lined up - it was a scrappy experiment and did not have to look a certain way. I like that I found a good home for this large scale Amy Butler print I've had since the beginning of my stash. And there are lots of memories in those little scrappy squares - of places, projects, and phases of life. A fun finish, to be sure. 

Friday, July 17, 2026

eat your heart out, anthropologie

These. Look. Awesome.


I nearly did not see this project through. I made a couple of pieces this spring and thought it was just too much work with the thin yarn and tiny hooks. Mom offered to pitch in and do a few, which gave me some extra oomph to get over the doldrums. We also found a few great artificial (non-yarn artificial...) succulents to add to the mix. I like that they both are bulky and take up space and add a different texture so the whole thing is not just fuzzy. They're also in shapes that I think would have been just ok with yarn but really look super in the plastic. 

I had some dense foam from something, making an ottoman top I think, that I used to fill in the bottom of the fixtures and the succulents are just kind of poked in (store-bought have stems) or perched and squished into place. It worked out surprisingly well and I think they turned out looking even better than I had imagined. They're a matched set in the stairwell and they make me smile every trip up and down the steps. 

Wednesday, December 9, 2020

pods, people

I think I’m going to call these plant pods. It seems like a satisfying moniker given that this photo makes it look like aliens have landed on my couch, hatched, and run amok.


In fact, these are a new addiction of mine. All it takes is an L hook and one ball of cotton yarn. This was based on a free pattern from Bernat using one of their chunkier yarns, but I found that holding the Lily’s cotton yarn double worked just as well. I’ve also got some small ones I made before these using just one strand. They’re pretty cute, too. 


I modified the pattern to be a little bit deeper in order to accommodate the pots I used to transplant some jade cuttings I had been rooting in water to give to our neighbors as holiday gifts. Of course, once I started I couldn’t stop! All the yarn had to turn into plant pods. So, I had a few extra made up so we can keep one, Mom gets one, and I gave one to my friend Andrea since she’s a fellow plant enthusiast. 


They are meant to hang on the wall. I think a hip hook would make this jade plant look rather nice, no? I really enjoyed working these up. Not only were they fast, but they are a great excuse to buy the pretty balls of cotton at the store when you don’t need anymore washcloths in the kitchen. And they satisfyingly used up most of the ball of yarn. I made some more reusable cotton rounds with the (small amount of) leftovers. They’ll end up in Mom’s stocking. Now I’ll just hope the jade cuttings establish themselves well enough before Christmas week so these can get delivered to doorsteps in fine form. 


Pattern: Hanging Planter Pods (my Ravelry page)
Yarn: various Lily Sugar ‘n Cream cotton balls 
Hook: L (8.0 mm)

Thursday, November 19, 2020

Halloween catch up

Ha! Well predictably since my folks got here I have been spending much less time on the computer. That doesn't mean that I haven't been making things - in fact we've done lots of crafty things (including some festive Halloween masks!) in the last couple months. I'm going to round up the Halloween bits in this one post and then the rest of the things are wips that I can write about as the holidays approach. 


First things first, I finally finished my set of spooky pillows. These were really fun to make and they were good opportunities for playing with some more complex quilting. First the large ones. The one on the left got a geometric square spiral treatment across the whole pillow while the one on the right got some nested diamonds in the big arms of the X's. It definitely takes a lot longer than just straight line quilting but it looks really cool when all is said and done. 


I backed those pillows with this very appropriate print from Ruby Star Society. I'm not sure it was meant to be a Halloween print but it certainly plays the part well. It also works really well with the dusty blue zippers I used. An unexpected color given the holiday, yes, but that bluish purple moon pulls it all together and makes it look like it belongs. I've got just a little bit more of this print and I can already say it's going to be a precious commodity.


The set of smaller pillows look a little more "fall" and a little less "Halloween". They got a lot of different free motion quilting treatments on them. Unfortunately I was lazy and didn't put a back on the quilt sandwich when I did it (i.e. just the block on batting, no third piece of fabric) and I think the texture suffered. Instead of pulling the fabric down from the front, the threads just sunk into the batting from the back to relieve the tension. 


Kind of a bummer, but again fun to practice different shapes and swirls - and to realize how difficult it is!! I had a bear of a time getting my curves to look nice. Somehow I thought doing all those fun wavy lines and circles would be easy. Psh. Once I survived the quilting, these got a heavy gray canvas backing and some bright orange zippers. 


Possibly my favorite Halloween project was this wreath. Mom and I were out at Joann's and couldn't resist the pretty fall picks they had on sale. Well, we picked up a handful of those and a grapevine wreath and had some fun. It didn't take long at all to get this together and I looooove it. It was a nice addition to the decor upstairs


Along with our pack of pillows, our house had Halloween covered.

Friday, July 3, 2020

a festive fourth

Well here it is, my second wall hanging for the house. My Halloween pumpkin patch finished up rather quickly once we moved in, but it took longer for the next to come around. The holiday horses are still basted and folded...... 


I used this little piece of improv as the experimental first voyage of the quilting frame Dave got me for my birthday last fall. It took a bit of fiddling to set everything up, but now that the bits and pieces are assembled it should be quicker the next time around. I have to say, I think it’s going to be great once I get used to it. I’m very good at drawing, but less good at drawing while moving the paper instead of the pen. That is how this works, in contrast to a long arm where you move the needle like you do when you draw on paper. 


I had grand plans of doing a bunch of straight lines to echo different blocks, but decided to opt for a loopy all over design while I got used to driving the new contraption. It was a bit of a chore to get tension right - definitely had it right for two passes and then had to take out the next FOUR because of snarly thread on the back. In the end I put the machine back on AUTO and it worked out fine. I read somewhere that you needed to take it off of auto and ramp up the tension for it to work right. That seemed to work out in the beginning but I made a small adjustment partway through and BAM. Snarly thread. 


I found this great striped fabric for the backing and bought enough so I had plenty left for binding. Gotta love a stripe for binding. It also hides some of the imperfections from the machine quilting on the back, even with the white thread. That’s the side against the wall anyway, right?? Like I said, the quilt frame is going to take some getting used to. 


While it wasn’t the geometric coup I had in mind, I do think it’s pretty festive looking. The loops give it lots of texture and actually contrast with the highly angular patchwork pretty well. I suppose if you squint they could look like fireworks. And it’s done in time for Independence Day! Score one point for me. 

Wednesday, June 17, 2020

bonus wall hanging in progress

Well this feels pretty good to get done, or rather assembled into almost doneness. My little HST scrap blocks have been hanging around on the wall for a while waiting for me to decide how to finish them. I knew I wanted a wall hanging for the upstairs loft, I just wasn’t sure where to start. I got the idea of a random arrangement of the blocks from oh so many inspirational modern quilting examples I’ve seen. The problem? How do you get it to seem random without pulling your hair out? 


The answer to some extent lies in “just start” and the rest in serendipity. I started out with my favorite block, the on point pinwheels, and sashed it with jelly roll strips of white. Then I assembled some of the other blocks and just started playing around with the background pieces I had, cutting strips and chunks as I needed them and working by section. There’s a bottom section, a top left, and a top right that are all pieced into great big rectangles that were then assembled together. I added a couple more jelly roll strips on the right and bottom to make it a little bigger and voila. It’s just a little bit longer than the pumpkin wall hanging I made for Halloween, so I know it will look great on the wall where I’m planning to put it. Now the problem is figuring out a backing.


I could piece it from the leftover jelly rolls, but I kind of want to use those in other projects. I’m thinking another pillow cover and maybe something festive for Valentine’s Day. The issue is I don’t have anything that appropriate for the back right now. It might be time for a quick trip to Joann’s again; they had a lot of super cute patriotic prints the last time I was out! 

Monday, March 9, 2020

stitches managed

I am so very proud of this embroidery hoop. I think an apt name would be "Portrait of the Artist in her 20s" because this reminds me of all the time I spent hiking in the woods and wilderness in California and Utah during the time shortly after I moved out to California. I was an adventurer and a daydreamer, just like this picture suggests. 


The DMC National Embroidery Month celebratory blog/video series was so fun to do. It proved, as I suspected, that a little bit each day on an unfamiliar project with totally new skills would lead to something manageable. I'm feeling accomplished with the amount I learned in a short time and also that I managed to translate it all into this project with no practice. For having taken the plunge, this looks like a skilled stitcher made it! That's really a tribute to the bite sized videos and instruction; there was no way I would have taken the blank pattern and done anything like this without the visual lessons. Thanks, DMC!

Straight stitch, stem stitch, whipped backstitch, satin stitch, French knot, pistil stitch for the poppies; 
encroaching satin stitch for the meadows

I did not end up purchasing the stitchable cork that was suggested for the ground, opting instead for this pretty gray-brown-green felt already in my stash. I am however intrigued by the cork, so maybe that will come in a later adventure. I also didn't buy all of the suggested threads, using what I could find in my stash to augment some actual purchases I made. The sparkly etoile thread was definitely worth getting, and I like the pearl cotton for the mountains. 

Basketweave stitch, star stitch for the hat; smyrna cross for the sweater; 
cable stitch for the jeans; braided turkey work hair

I am very pleased with the smyrna cross sweater in particular. These two colors were yarns I've had wound up in my embroidery box for a very long time. I'm sure they are leftovers from an old project in my tweens. It turns out that they gave me a sweater that matches a blanket we bought in San Antonio when the 'Cats went to the Alamo Bowl. Northwestern wildcat pride! That, combined with the deep dark brown braids, really makes this person seem like me.

Raised satin stitch for the sun; long and short stitch for the mountains

The fringe stitch trees were the most difficult part. I had challenges getting coverage to the extent that I was happy with and also trimming everything evenly. I think maybe sharper scissors may have helped, but I'm not entirely sure. Regardless, the trees definitely make the most impact on the whole piece because they are visually dimensional and texturally interesting. It is hard to resist petting the trees, I'll be honest. 

Fringe stitch (turkey work) and fly stitch for the trees

Second to the sweater, I am very tickled with how the clouds turned out. I just picked a few random scraps from my stash to play with and the colors are perfect. In fact, driving home the other night I saw clouds of nearly identical color to these as the sun set. It was a lovely confirmation that sometimes our imaginations are really grounded in the real. 

Colonial knot clouds

I was not very happy with how the magic paper came off of the fabric. It seemed like the ink stuck to some of my colors and dulled them, especially the sun, and you can see the 'coffee stain' from drying around the edges of the project. That's a bummer, but the paper was so handy that I'm not certain it would keep me from doing it again. Luckily the hoop hides the stain so you can't even tell. Maybe next time I should use warmer water and agitate more?


I just did a quick trim of the edges and a running stitch around the back to finish up. The stitching on the back looks quite neat, so I may not put a back on it. I do have to remember to put a label though because this is something I'm going to want to remember making long after I'll recall the year I did it! 

Saturday, February 29, 2020

leap day loveliness

Today is Leap Day! That also means it's the end of National Embroidery Month, so I've got an afternoon of stitching planned to get my trees and clouds finished on this little piece of awesome.  


I'm not certain how the clouds will turn out, but I did find a set of yarn leftovers in my stash that I think will combine nicely to make the illusion of a sunset. I'm loving the colonial knot work so far and I think at least my first yarn choice is spot on. I decided not to do the stump work because when I saw it on the videos I thought it stuck out weirdly and looked a little out of place. The knots themselves are enough without the extra poofiness. My goal is to be done with everything but the braids tonight so I can soak off the magic paper. Stitch on!

Wednesday, February 26, 2020

stitchery progress

I enjoyed a bit of California February today and took my al fresco lunch outside. Nothing says "winter" like avocado and tomatoes, right??? Ha. Lucky me the sun was shining and the birds were singing, no joke. I'm only a little bit behind on my embroidery project for National Embroidery Month, so I'll catch up in the next couple of days and get it finished, I'm 100% sure. 


What was keeping me the last couple days was actually the fact that I did not have the thread to do the mountains. The pattern calls for pearl cotton number 8 in a series of grays. I of course could use a series of any color in any thread, but I don't actually have a nice set I like in my floss, so I ventured out to the local thread store. Yes, I now have a local yarn shop AND a local thread store. The place was amazing and welcoming and well stocked. I'm very excited to explore some more, but this time I left with just the four colors I needed. I ended up with pearl cotton number 5 instead of 8, but I like the thicker thread anyway. 


Mountains, trees, clouds - that's all that is left! I'm going to leave the braids for last after I soak the whole piece to get the Magic Paper off. It doesn't make sense to me to soak the braids unnecessarily. Just keep stitching, just keep stitching...

Sunday, February 9, 2020

stitchery

Apparently February is National Embroidery Month. I didn't know this until I got an email from DMC telling me so, but there you go. To celebrate the month they have a stitch along going that I think I'm going to try to keep up with. The finished project looks so lovely, and a little bit of stitching every day should get me there. Of course, I have lots of thread and lots of other things I could be doing with it, but I really liked the design and it will stretch my skills.


I was a few days behind in getting my hoop set up and started, but it just took me an evening to get about halfway caught up. The big UFO looking circle in the middle was an "oops" in printing on the transfer paper, but it's no big deal to just ignore it and stitch on the correct lines. My one complaint about the pattern is that there isn't really any indication of what stitches or colors go where, so I have to wait for each day's stitch along video to be posted. That's not a big deal, and I'm sure done on purpose, but it would be nice to have an annotated pattern to work off of. 


Tonight I'm totally caught up with the posted videos and I think my poppies turned out looking quite nice. I'm also getting to use my nifty bumble bee needle minder and all the accouterments of hand stitching I've got squirreled away. There are a couple of new-to-me stitches so far and I am really looking forward to learning more and adding bit by bit to this each evening. Detailed embroidery like this is something I've never really done before, and so far - super fun. 


Sunday, January 5, 2020

holiday crafting

We were so lucky this holiday season to have my parents and nieces come stay with us for two weeks! Before we moved our trips involved a lot of going out and exploring the Peninsula and San Francisco in part because it's fun and also to be honest our place was small for guests. Now that we've moved further from the city and have more room, we had a lot of fun exploring the new town and local area as well as sticking around home to cook, craft, and putter around. It was marvelous! They left yesterday, but I've enjoyed looking back on some of the projects "the girls" got up to. 


First things first, Mom brought a kit to make a paper wreath for our French-ish bedroom. There was a lot of hot gluing involved, and Mom was an expert paper roller. The girls had fun trying on the cones as unicorns and seeing if we could put pom poms in them to make them ice cream cones instead. It turned out really well and is hanging in my craft room waiting for us to finish up our bedroom so it can find a good home. 


Oh, did I mention pom poms? We made a lot of pom poms. At first it was kind of just something fun to do with some scrap yarn I had. We even went out to Joann's to get some really fluffy yarn to make huge ones. We made long hangers on them and hung some from our chandelier in the dining room for a festive atmosphere. (Anthropologie, eat your heart out!) Then Mom and the girls pulled up some of their Pinterest ideas and showed me a bunch of pom pom wreaths. Well. That had to happen. 


Observant viewers will also see another project that I don't have great pictures of - unicorn ornaments! We had a lot of fun with glitter paint, sculpey clay, and hot glue to make ornaments that look like whimsical unicorn heads. And narwhals. And a kitten. They were well worth the effort. Back to the pom pom wreath. We spent a few minutes here and there over the days making pom poms until we thought we had enough to fill out a 16 inch styrofoam wreath. We've got sizes from about 5 inches all the way down to an inch and a half. I thought we'd hot glue them on, but instead we ended up using a combination of tying and pinning to get all the fluff balls fixed onto the wreath. It turned out looking super cute and is hanging up on my craft room wall where it makes me happy every day.


One of the last nights everyone was here, mom and daughter got to do a project together just the two of us. Mom had found a tutorial for these Danish stars and wanted to try making some. They take just four strips of 2.5" wide fabric to make and the only sewing required was to sew the strips in half longways so you had a thin strip with fabric print on both sides. Then essentially it was a folding game. We combined a few different prints I had into four stars, one for each crafting gal we had. 


When we were finished, Mom had the bright idea to hot glue a twine hanger into each of them so we could use them as ornaments. Mine quickly found its way to the tree. 


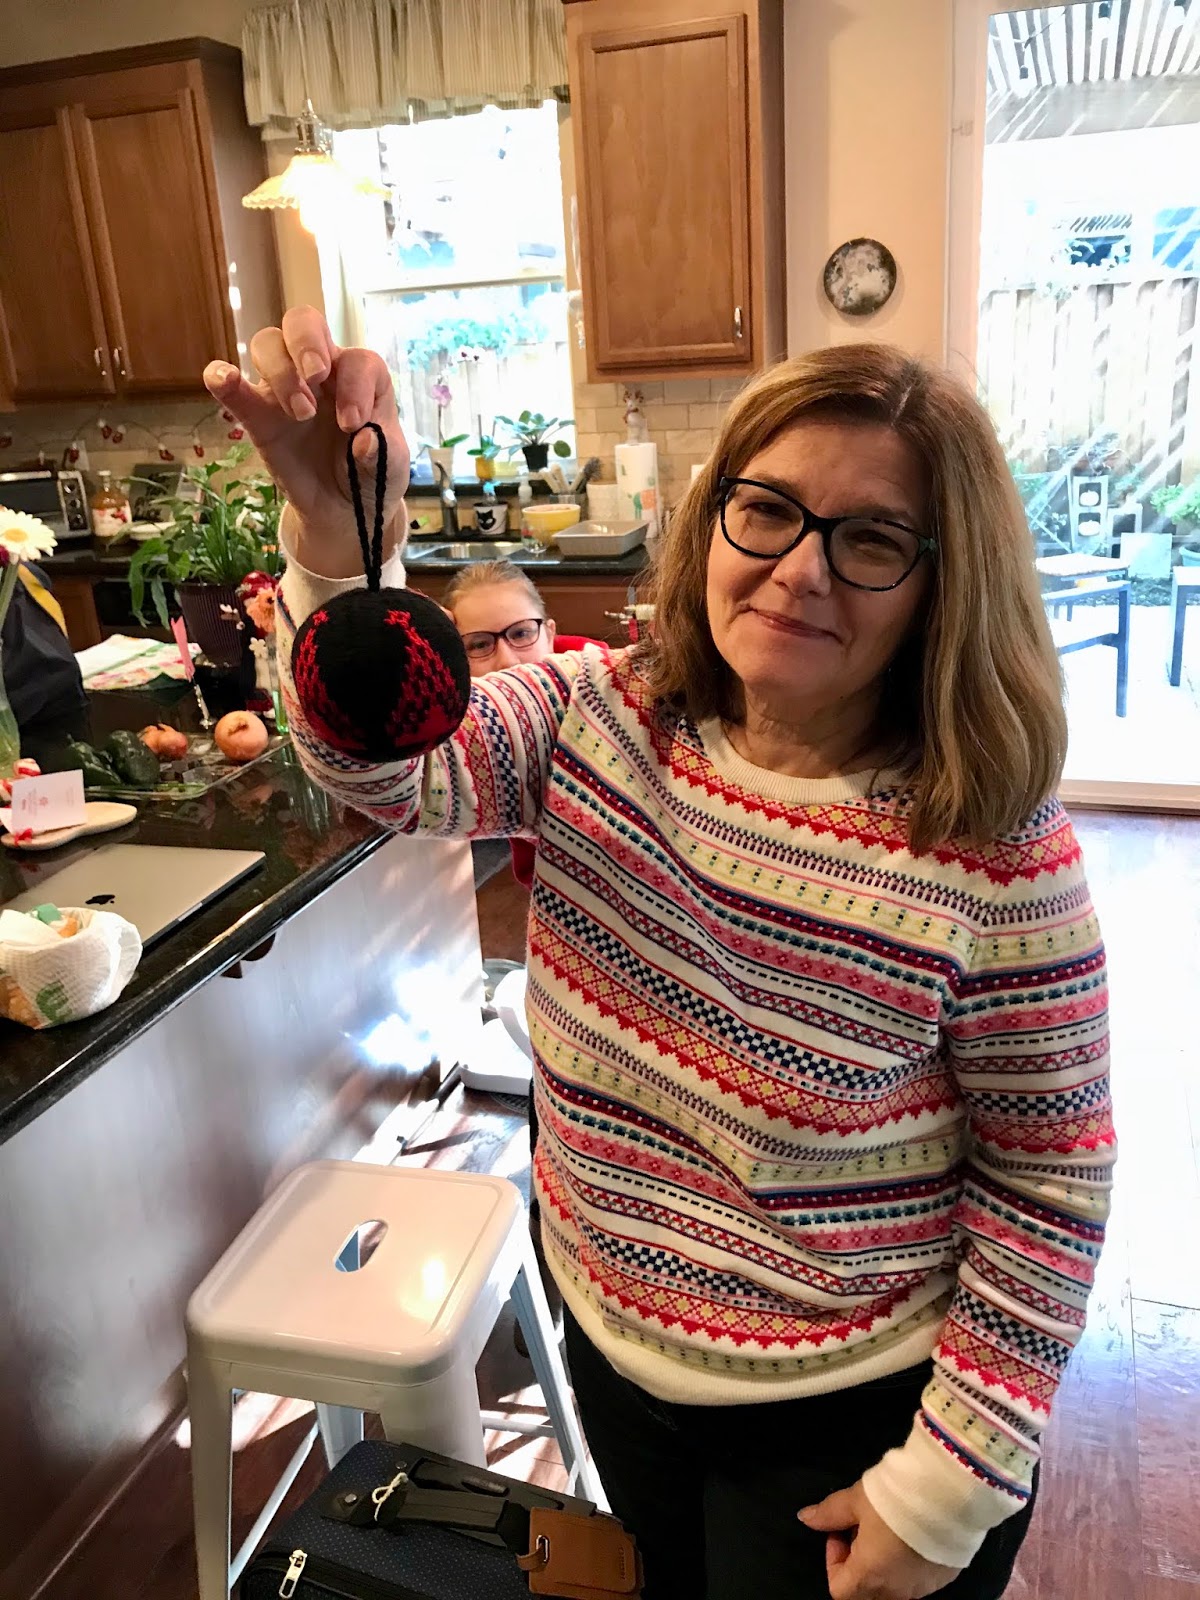
And of course, no trip is complete without a last minute project. This one finished literally minutes before everyone headed out the door to the airport. I wanted to make Mom a julekuler this year but wanted her to pick the pattern. I forgot until the last night - yikes!


Luckily, it only takes me a couple hours to make one at this point since I've made so many by now. Mom picked this pretty tree motif and I started it one evening and finished it off, stuffed it, and made a hanger the next morning. Phew! 


It was a wonderful holiday and end to/start to the year.